Showing posts with label Photography. Show all posts

Sunday, January 09, 2011

Top 10 Signs That You Have Gone Too Far When Photoshopping A Photograph

pin_0821-02

We all know that art has no boundaries so how do you know when you have gone too far with the Photoshopping of a photograph? To help you out I have compiled a list of the top 10 warning signs:

Top 10 Warning Signs That Let You Know That You Have Gone Too Far With Photoshopping An Image

10. Only your parents would put it on their wall and you find out later that they take it down when you are not there
  9. Young boys want to have a black light poster made of your image to hang on their bedroom door
  8. Young girls think it's cute
  7. You think it's cute
  6. People you don't know give you crop or cloning suggestions
  5. People you know give you crop or cloning suggestions
  4. Someone says your work reminds them of another person, and it turns out that you can't stand that other person's  work
  3. Someone wants to know what HDR program and Photoshop actions you used
  2. Someone buys it and asks to have it framed in gold and matted with black velvet
  1. Somehow it reaches the top 10 in Explore on Flickr

Friday, December 10, 2010

The New Kodak Portra 400 - Wasn't What I Was Expecting - A Short Review

Playing Sunset Hoops
From My First Roll Of The New Kodak Portra 400 Shoot With My Mamiya C220

It's not often these days of digital that a new colour film is released by a major manufacturer.

Last month Kodak released a new Portra film to replace both the Portra 400 NC and Portra 400 VC with just straight Portra 400.

What was I expecting? Maybe a ISO 400 film with the best characteristics of Portra 160 VC and NC with maybe some of the pizazz of the new Kodak Ektar 100.

What I got was a perfectly tame film. Good skin tones better then the old VC version of the film with slightly more saturated colours then the old NC version.

Scanning is extremely easy, usually I have to play around with the scanner black and white points for each colour to extract the whole dynamic range of a negative. Not so with this Portra even under difficult sun back-lighting it's one touch scanning. The problem with the scans is that they lack contrast basically dull with all the information packed nicely into a smooth histogram,unusable without further digital processing. Once processed the results are rather good.

Portra 400 is definitely not a replacement for Portra 400 vc or nc it is a entirely new film designed for the digital age. This film fits the needs of a professional photographer that needs a film that works consistently well with their digital workflow. It's not for those that want to develop and go directly to print. Yet with a bit of post both the new Portra and Ektar can make large prints that blow the DSLR out of the water in both colour and resolution.

Pros : Accurate skin tones, Sharp, Medium Saturation, Easy to scan
Cons : Needs post processing to bring out contrast update
Best Uses : Difficult Lighting, Batch Workflow

Fall Is Dead Long Live Winter

Thursday, November 04, 2010

Using Olympus 35 sp Rangefinder For Night Street Shooting With Fash

Left Over Gear From The G20 - Halloween on Church St

The Olympus 35 sp (produced 1969-1976) had some interesting advanced for the time feature. One of the features is flash control: By setting the  flash guide number (GN) on the aperture ring-dial  the rangefinder's aperture setting is slaved to the rangefinder focus distance. The farther away the the subject is the more the lens opens up to compensate for light fall off of the flash with distance.  For this type of event this method has certain advantages over an auto flash which is often fooled by bright or dark surfaces.

Add to the camera a small flash with a coiled connecting cable and this allows for some interesting handheld off camera flash use. Most of you need no reminding  the benefits of using off camera axis flash over on camera flash. So far I have only used this for night street use but maybe I will try some Bruce Gilden flash in the face style shooting.

Pink Devil - Halloween On Church
More of 2010 Halloween On Church St.
 
Not So Scary Night of The Dread
Contact sheet for the annual Dufferin Park The Night of the Dread. Here are the rest of the shots taken that night.

So ends the first stage of the experiment
Conclusions:
  • Aperture slaved to flash guide number and the rangefinder' focus distance works well for getting good exposures.
  • Flash handheld off angle is better then on camera flash and you can still focus OK
  • For close work a flash diffuser would really really help and also allow a lot more background to show up.
  • For this use B&W is better then colour.

Saturday, September 18, 2010

Art of Triptychs, Diptychs and Polytychs - Intuition Versus Intellect, Left Versus Right

Yin Yang Cityscape

A few years ago I started a small group on flickr called Art of Triptychs, Diptychs and Polytychs. The form fascinates me but I can't help wondering how some of the contributers to the  pool do such a superb artistic and aesthetic job of choosing their images.
I confess my own polytychs are not very artistic. I'm a pretty equal right brain/left brain type of guy. Unfortunately this doesn't mean I'm balanced, quite the opposite at one moment of time I am either one or the other not both.

A chimpanzee brain at the Science Museum LondonImage via Wikipedia

For me polytychs are particularly hard art form because as soon as I start to think about joining 2 or more images together the reasoning/logical side of my brain switches in blocking out any intuition and creativity.

Off And On

I don't have this problem with in camera double exposures. I either plan the 2 shots before I take the first one or I take the first shot and hold it in my mind until I find something that fits with the first shot as the second exposure. In either case when I'm photographing my brain is usually in creative mode. I have been practising doing double exposures for several years now so even the planning is subconscious.

Sunday, September 12, 2010

Fun With B&W Film - How To Do HDR From A Single Scan

Fun With Scanning 30 Year Old B&W Film - Single Scan HDR
Right side is a special colour scan of a B&W negative, the middle is a normal scan plus some dodging and burning. The right-side is a HDR image obtained with the 48bit colour left-side image. The right side is scanned in 48 bit colours where the individual RGB channels are adjusted for gain, offset and gamma via the histograms utilizing the epson software prior to scanning in this case the green channel is normal exposure the red is -1.5 stops under exposed and the blue is +1.5 over exposed. After the scan the RGB channels can be manipulated as a colour image or separated into 3 monochrome channels. You can then  process as a colour image or alternatively as an HDR or with tone mapping software. Or as I mostly do you could keep it as a toned image or convert it back to B&W.

This being 30 years old Kodak Plus-X it does not have nearly the dynamic range of that of most fresh films such as tmax would have.
Fun With Scanning 30 Year Old B&W Film - Single Scan HDR
RGB channels are actually B&W tinted for visualization purposes only

The Ghost That Walks Beside Us
The Ghost That Walks Beside Us is a direct manipulation of a 3 channel B&W scan

Casa Loma Stables - The gold tones are because of the scan RGB gains of (1.5,0,-1.5) The reverse of the blue tint above.

Wednesday, August 25, 2010

Who Says Sunny 16 Can't Lie

The title is a spoof on this 1959 Popular Science article Who Says a Light Meter Can't Lie I doubt if this was the first article on the subject it certainly isn't the last. Personally I use a good light meter mostly in incident mode. If it lies it's because of operator error usually because I didn't make up my mind before I took the shot on what the subject should be.

One of the proposed solutions is not to use a light meter. If you shoot film you have most likely heard of Sunny 16 Fred Parker's The Ultimate Exposure Computer is the best reference I can find on the application. Sunny 16 seems to be a good method in normal outdoor nature type photography that is if you have some experience with the light in the location. Normally scattered light makes up only 10% of the incident light but this can change because of reflected surfaces and atmospheric conditions. How hazy, diffused or how soft can be a difficult measurement to make with only the human eye. As it was not a survival requirement us humans are not good at making absolute light intensity measurements, you need experience and references to adequately judge light in many conditions.

Most of my shooting is done in a city environment where tall building often shade out the sun, where  scattering and reflections make up a higher proportion of the light then in the open air. Even here a friend of mine has learned to judge the light mostly correctly but sometimes a couple of stops off. He uses years of experience not sunny 16. In the golden hour shooting into the sun and away from the sun is one of the best times to get dramatic city scenes. But sometimes he is fooled and is several stops wrong.

When the sun is at 10 degrees to the horizon on a early fall afternoon in Toronto because of the extra amount of atmosphere or air mass (AM) it has to pass through there is about 1 stop less light then at noon. The science is well developed and you can go here to see the math and use their calculator. The factor depends mainly on global position, time and date.

Shooting into the sun you have to contend with a super bright background (the sun and sky) and reflections of surfaces like pavement, choices like highlight or silhouette. How much reflected light is getting back on the subject and so on. Shooting away from the sun both the reflected light and the angle of the subject to the sunlight can make up to 4 stops of difference. The amount of light falling on the subject varies around 3 stops depending on the angle of the sun to the subject. At  10 degrees to the horizon there is about 2 stops lower illumination between the horizontal surface for example a road and a vertical standing structure such as a person. Once again this interactive graphically illustrated calculator comes to the rescue to save the reader from having to view my hen scratching.

Tip: I learned to use a incident/reflective light meter by carrying the meter around with my digital camera. After about a month I could set my digital camera using the meter and get better exposure first time then using the digital: shoot, chimp the histogram and repeat method. At that point I knew I could rely on on the meter for all my film camera. Even with digital I still prefer the light meter in studio and critical lighting conditions.

Don't forget that film is usually more sensitive to under exposurer while clipping because of overexposure is the bane of digital cameras.

Tuesday, June 15, 2010

Making a Pinhole lens for a Canon DSLR


Originally From My website July 2005
Specifications:
Depth of Field - Infinite
Equivalent focal length - 50mm
Resolution - very poor!
Speed - slower then you can imagine.
Cost - cheapest Canon lens (the main component is a Canon part)
Making the Pinhole Lens
Parts:
1. Canon camera body cap. Canon caps because they have a thread are claimed to be light tight. I brought an used cap, so technically this is a used Canon lens. Test out the light tightness of the cap by placing it on the camera body and exposing a shot directly into the sun for 5 seconds or so. The exposure should be completely dark. This test is good for other models and makes of cameras.
2. Quality aluminum foil
3. Plastic film with self adhesive backing. I used the clear 3m film that they apply to the front of automobiles to prevent rocks from chipping the paint.
4. Hollow tip 32 gage needle. I used a new insulin pen needle.
5. Sharp craft knife or razor blade
6. Cutting board as a work surface
7. Small piece of dense stiff foam such as styrofoam
8. Cork
9. 3/16" drill
Construction:
1. Drill a 3/16" hole in the inside center of the cap. Use a piece of wood as a backing so that the hole will be fairly round. Use the knife to clean and deburr the edge of the hole.
2. Cut a donut shaped piece of plastic film 3/4" OD. - 3/16" ID.
3. Cut a 1/2" disc out of the aluminum foil.
4. Flatten the foil by placing on a hard flat surface and rubbing the foil with a piece of cork (drink the wine first). Be careful not to damage the foil.
5. Place the 1/2" foil disc on the backside of the cap, centered over the 3/16" hole.
6. Remove the backing to expose the adhesive on the plastic film donut.
7. Place the film donut sticky-side down centered over the foil, use your fingers or the knife edge to seal the foil between the film and the cap. Make sure the foil is flat and sealed around the complete circumference. Note there should be only foil covering the center of the cap.
8. Place a the cap face up with the bottom of the cap and the foil supported by a small piece of dense stiff foam.
9. Very carefully puncture the center of the foil with the 32 gage needle. The motion of the needle should be straight up and down., any sideways motion or too deep of a penetration will distort the pinhole.
10. Have fun!
Alternative Way to Make the Pinhole
Before the foil is installed in the cap just after step 4:
  •  Once again the foil must be supported by some dense stiff foam such as Styrofoa 
  • Make the pinhole as in step 9
  • Repeat step 4 the foil flattening step
  • Inspect the hole to make sure the edges have not been pushed back into hole by the flattening of the foil
  • Install the foil as before
Using this method allows you to practice making pinholes and also allows you to inspect the hole before installation. Note that the needle can only be used a few times before it will get dull and has to be replaced.
Each different pinhole will have its own unique qualities, ideally the pinhole should be perfectly round, perfectly flat and as thin as possible. This is impossible without buying a manufactured hole (yes you can buy a hole) . Unfortunately my microscope is on loan so I can not actually inspect the pinhole except by holding it up to a light bulb. Hopefully I will update the page with actual hole details when I get the microscope back. Alternatively a flatbed film scanner could be used to scan the hole.

Notes:
  1. I originally used plastic tape instead of the film. But it took a couple of trys to get a good (nearly centred) pinhole, I found it was very difficult to remove the gummy residue from the tape backing, I tried soap and water but that did not work. I tried a cleaning fluid but as you can see in the pictures it attacked the plastic cap and messed up the finish. The plastic film has an adhesive that stays with the film even after you remove the film from the cap, this makes replacing the pinhole an easy job.
  2. Dimensions except for the pinhole are approximate.
  3. Many of the pictures have some contrast lose, some even have a rainbow effect. This could be caused by light leakage, a ragged irregular pinhole edge or most likely from the large amount of light that comes through pinhole outside the FOV (field of view) of camera sensor. This light is reflected and diffused onto the sensor. If I shield the lens from off angle light the effect goes away see below for a partial solution..
  4. The low resolution of the lens is mostly related to physics. The pinhole is around 0.3 - 0.4mm diameter and a pixel on the camera sensor is many times smaller. The only way to get higher resolution would be to have the camera sensor area much larger, lets say as large as a large format camera. No way on a proconsumer camera! There is also both a diffraction limit and equivalent For a lens hood I brought an inexpensive rubber hood and glued it on with Gloop. The hood allows about a 90° field of view which is still too wide for the pinhole lens.F stop light limitation on the minimum pinhole size.
Some References:
This Page On My Original Website - contains some more details and pinhole image processing tips
My Blog posting homemade 8x10" large format pinhole cameraThe Pinhole Gallery - A Gallery of Contemporary Pinhole Photography
The Pinhole Camera - Imaging without Lenses or Mirrors By Matt Young (Some of the physics and history of the pinhole camera)
Luminous Landscape - Pinhole Camera Tutorial This page has some good photos and suggestions for making large format film cameras
Isabelle Lousberg If her work doesn't inspire you why bother!
F295.org - Exploring 21st Century Photography
youdesignit.com - pinhole-photography
Online Schools: Guide to Pinhole Photography
PINHOLE PHOTOGRAPHY AND CAMERA DESIGN CALCULATORS  

August 21 2005 Pinhole Pictures with Lens Hood

Two Bicyclists
 Wards Island Gap
Please contact me for permission to use or reproduce any part of this page photos@rraz.ca
Ryan

Thursday, March 18, 2010

Odds and Ends In B&W Film Development

If you can soft boil an egg and you have a sink you can develop B&W film

Lucky Seven D76 Development Times
B&W Development From One Shot Powder D76
8x10" Large Format Foam Core Pinhole

Now days I mainly use one shot (dispose after one time use) Kodak  TMAX Developer for pushing and Kodak XTOL for other work. I still like very Dilute d76 for my 8x10" litho ortho film this only because I can develop by eye under a red safe light.

XTOL is one of the most environmentally friendly developers. It is also one of the best general purpose developers. I hear that Ilford DD-X is similar with the advantage that it is already in liquid form and a disadvantage that it is at least twice the cost per roll. I would suggest to the beginner that they would start out with a general purpose developer and get the basics down before experimenting with other developers and developing techniques.

For fixer I use a Kodak or Ilford rapid fixer. I reuse until it is too slow (takes twice as long as when fresh). A tip: Drop a piece of the film leader into the fixer  and wait for it to clear multiple that time by 2 (3x for TMAX or Delta films) and that is the time you need to leave the film in the fixer. Kodak TMAX and Ilford Delta films eat up fixer and usually need much longer fixing times then other films. Important before disposing of fixer down the sink drop some steel wool in the spent fixer and wait for 24 hours. The steel will scavenge the silver out of the fixer. Remove the steel wool and now the fixer is safe to dispose of. Silver in solution is very toxic to the environment.

I do not use a stop bath for film (you need it for paper) it is only necessary if you have really short development times.

If your water is hard or has a lot of iron then use a Brita water filter. I let normal tap water sit over night with the top off the container so it can reach room temperature and any chlorine can come out. This is easier and less wasteful then trying to keep a constant temperature with running tap water Using the Ilford method for rinsing (see reference below).

When the film is wet the surface is soft almost sticky and can be permanently embedded with dust and water marks, it is also easily scratched at this point. Some tips on drying your film :
  •  Use a separate final rinse with a drop of wetting agent, if you have hard water then use distilled water for the final rinse
  • Turn of your exhaust fan (leave it off) and run a steaming hot shower. The small particles of water will clean the air of dust particles
  • Before hanging hold the film at both ends and shake to remove excess water. Be careful not to use excessive force or you could damage the emulsion
  • Hanging the film on a diagonal will speed up the time that it takes water to run to the edge
  • You can blot excess water of the edges or end with lint free cloth or paper, coffee filters work well. Do not touch the emulsion! A rocket blower or other rubber bulb duster is a good investment as water drops can be blown off with a jet of air. It will also save you a ton of money in the scanning stage as canned air is really expensive.
  • While a squeegee is sometimes recommended at the beginning of the drying process it is also responsible for scratches especially on films with softer emulsions. So consider not using one or possibly using your fingers (minus nails) as a better substitute.

Fixer Update: 

It appears that a hypo-clear or eliminator after the fixer stage does not have much use with negatives (different for paper) and a rapid fixer, in fact residual thiosulfate and thionates may actual aid in the archival process. This article indicates that a 2 bath fixer may be much more effective then a single bath fixer as the first bath takes out the majority of silver while the second fresher bath removes products that the first bath can't.

Final Rinse Update - In the past I had spots now none:

The final rinse is 3 minutes in distilled water; After the 3 minutes I  then add 1 drop of Edwards wetting agent.; Shake really well for 5  seconds, wait  until any foam dies down; Then remove film from liquid. Shake off excess water and hang to dry. Note distilled water only makes a different if the water has mineral content.

Absolutely no spots!

Notes on final rinse: 

The distilled water adds  about $0.15 per roll but it seems to be worth it, The trick seems to be prior to adding the wetting agent leave the film in the distilled water for long enough to dilute (replace) any of the tap water in the emulsion.

The purpose of the wetting agent is to lower the surface tension allowing any surface water sheet off the film. You do not want the wetting agent to soak into the film. Do not use dish water soap as a replacement for the wetting agent as it contains many chemicals that are undesirable if left behind in the gelatin layer also it does not have all the same desirable properties as wetting agents designed for film. See update here: http://metrix-x.rraz.ca/2012/12/developing-film-and-water-spots.html

Updates January 2012 


Mixing Xtol

It seems to help if the water is towards the upper range of temperature (see instructions so that you don't overheat. I use a large plastic spoon to stir and break up any clumps wait and repeat, wait some more and repeat.... Eventually it will almost dissolve except I can never get rid of a few small specks which I ignore. Add other package with about 500ml of water. If you want to be exact about the 5l then put 5l in the bucket and mark the level before you start.

Using A Stainless Sieve

When you are filling smaller glass containers with the xtol for storage run it through a dollar store stainless sieve to remove any particles.

Sometimes in the winter my xtol stored in closed glass jars gets a bit of white cloudy stuff. To remove pour it through a fine stainless steel sieve just before using. Also used fixer can also can also get contaminated and the same trick will work here. Just make sure you rinse well directly after use. The sieve costs me less then $2 at the dollar store.

Silk Gloves Better Then Cotton For Film Handling

For handling film instead of using those cotton gloves which seem to pick up fuzz and deposit it on the film I found that silk glove liners that you use for winter sports work much better without picking up lint or static charging the film.

Useful References

The most important resource is the Massive Development Chart for developing times, while you are at it check out their meta list.

Don't forget to check out APUG and their Beginners Guide
If you like Ilford then check out their pdf on Developing Your First Roll Of B&W

If you use stainless steel reels and have big fingers like me 35mm film is a b!tch to load. I found this thread on Flickr Loading steel reels - an alternative method a useful resource (note the link to another thread and a link to a video) If you end up with moon shaped marks on the film that means the film emulsion has be physically damaged by pressure (in my case it usually because of a finger pressure. At the end if parts of the film look undeveloped it is usually because on part of the film has crossed a spiral and was touching another part of the film.

Plastic or metal reels when loading 120 film make sure you cut off the tape at the end or it could get stuck where you don't want it to be stuck.

For 35mm a tip is to not to rewind the leader all the way back into the canister (some of the newer cameras have a menu setting to leave the leader on rewind otherwise with manual rewind you can feel it when it is coming off the take up reel. If you have a leader you can trim it and start on the reel in the light!

Now days I trim the end flat and then rewind it back into the canister and open the canister and remove the spool in the dark with a bottle opener. This has the advantage of reducing the drag when respooling it on the reel.

For plastic I use AP reels and tanks, they are really easy to load and they have an innovative way of agitating without inversion. The only time I have had a problem is when I creased the leader and it got stuck starting at the second turn. Don't panic you have to release the film not by pulling it out as with other types of spools but by first separating the two halves of the spool. Make sure practise doing this and all other aspects of loading with your eyes close or in the dark.

If you use a changing bag make sure it is large enough not to be cramped. A tip I was given was to keep my eyes closed so you are not distracted and disoriented by your vision. I find it easier to load in a bathroom with the door and windows blocked out. (make sure you turn off anything with led lights and do not wear a watch that glows in the dark)

Kodak Xtol Developer - Unofficial Resource Page
T-Max Films -- What Rochester Forgot to Tell Us
A few ideas on using Kodak T-Max Films Successfully by John Sexton

You can see that I like TMAX film, what's not to like with a possible dynamic range of 19.5 stops!

Friday, November 20, 2009

Cross Processing Myths RIP

Cross Processing Myths RIP

The 2 myths I will be talking about is that cross processing E6 slide film in standard C41 colour negative gives unpredictable hence random results. Hence the popularity with lomography crowd.  Before you stop me I know plenty of people that take wonderful dreamy shots with lomo and other toy camera but none of them rely on random luck it's skill and artistic ability. Second lesser myth is that it is better to over expose expired slide film when you cross process.

First off in a past life I have a background in imaging and high speed microscope scanners including some patents that I'm proud of but most of what I am going to be talking about is based on observation and intuition. So bear with me while I go through some technical details:

Colour Slide Versus  Colour Negative film

Slide film in general has a much smaller latitude when compared to negative film this means that your exposure settings for slide film has to be more accurate then with negative film or your highlights will be blown out (sort of sound like digital doesn't it) on the other hand if you under expose the darks will be one shade of black.  With todays colour film a couple of stops under or over exposure doesn't make much difference it will look pretty much the same. Film records light in a nonlinear way so instead of clipping like in digital the highlights and shadows are compressed in a natural eye response type of way.

So why use slide film because if you get it right the resulting image has a much greater dynamic range (the difference in film density between the lightest to darkest part of the image), blues go from the palest lightest shade to inky almost black blues, the same for the greens and reds. A 8x10" colour slide on a light table is a glorious thing.  Maybe paradoxically it is more difficult to scan when compared to the more compressed lower contrast ratio colour negative. This is true even when E6 type slide film is processed in c41 (standard developing for colour negative films)

If you want better technical reading go

Here

Dynamic Range By Bob Atkins

and here:

Film Contrast by Perry Sprawls, Ph.D.

Film is not like fine wine it's designed to be used when it is still young. As film ages it gets bombarded with cosmic rays and maybe more important the layers oxidize and chemicals diffuse and mix with each other sort of like the ripples in hundred year old glass windows. Refrigeration  or freezer will extend the life but only by so much.  As the film ages the unexposed film slowly fogs meaning black  is no longer black but shades of grey. The colours in the dark areas become muddy and the grains of silver become more obvious and dyes start to bleed. (This paragraph is conjecture and observation on my part.) Astronomer super charge film sensitivity to low light by annealing it with special gas mixtures).

The lower the ISO the slower the film ages (this shouldn't surprise anyone). What sort of surprised me was that expired film  seemed to be fairly constant in exposure (ISO), with only the latitude and dynamic range  decreased by the level of fogging.

Now what does this all mean when it comes to exposure. Conventional wisdom seems to be to over expose to compensate for the fogging. I have tried this by a half a stop for 15 year old slide  film and all I did was sacrifice the highlights for a bit better shadows, I also tried over exposing by 1 stop and pulling the development by one stop, this was even worse, colour film in c41 seems to push better then it pulls. My best results is to shoot at box speed and meter the exposure for the subject of importance. It also saves me the time  money at the lab as most lab charge extra for pushing, pulling and cross processing if they can even really do the pulling correctly.

So shoot at box speed and meter for the subject, it's old film what do you expect new film? I'm only talking about colour slide film it's different for B&W and negative film.

Hotel Victoria
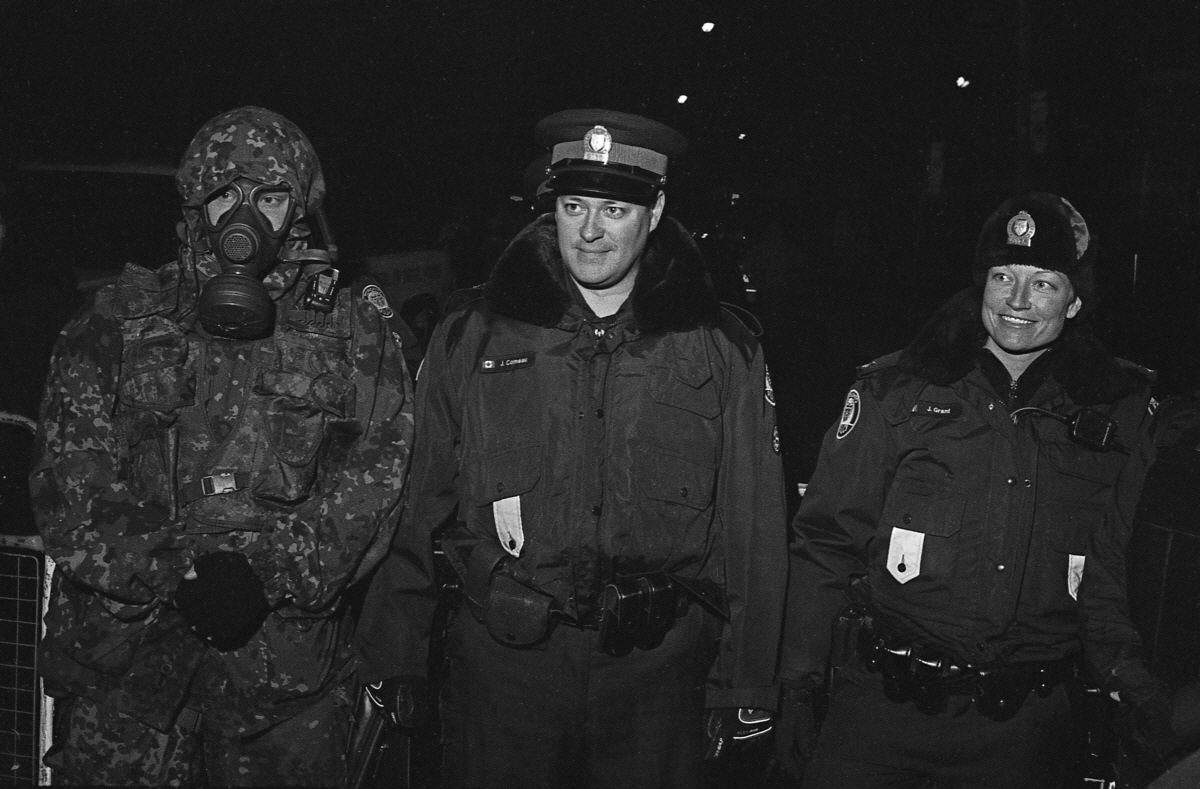
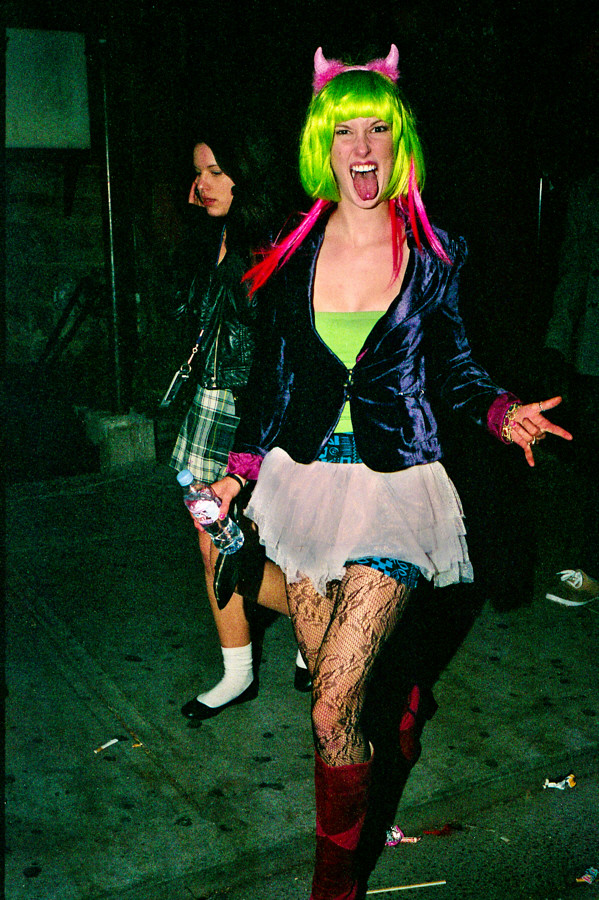
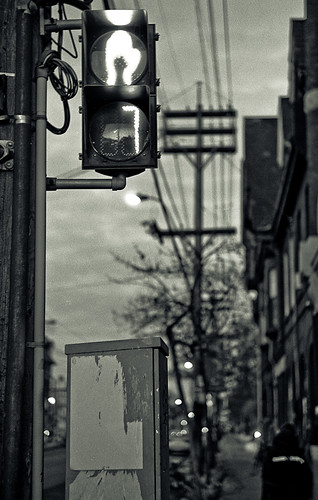
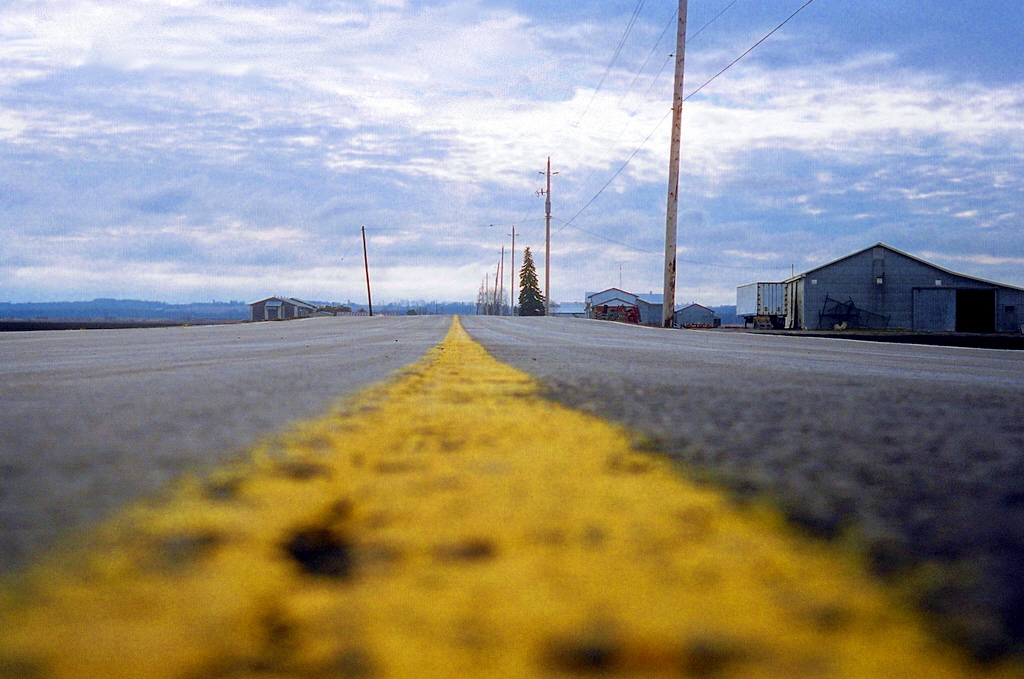
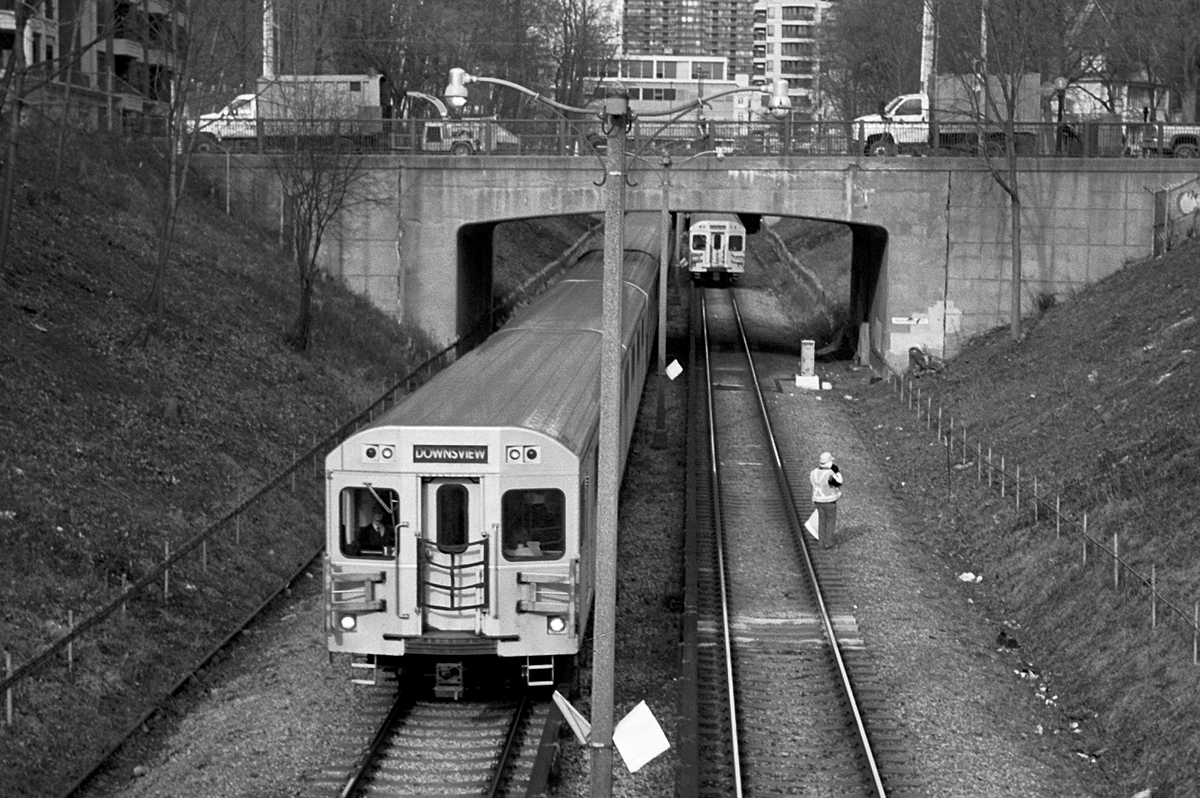
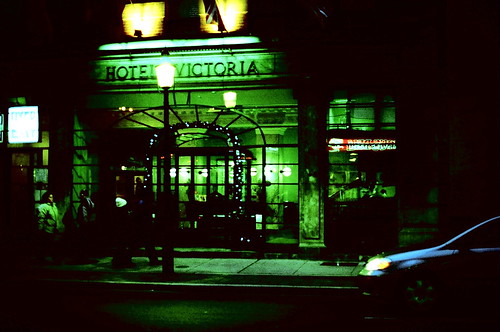
Lab Scanned Early Work

The big myth that cross processing gives random inconsistent results. Except for the occasional very rare damaged roll. I find the result from each type of film is repeatable and consistent.

When I first tried cross processing I didn't really know why the results  appeared to be inconsistent. I believed all the myths. First I thought it was how it was developed, then how it was exposed. A couple of years ago I started to examine the colour curves. I couldn't make any sense out of them so I thought it was cross talk between the RGB channels red getting into the green channel, blue into red, ... sort of like the current lomo fad (ducks) using redshft film to shift the colours into the yellow orange red spectrum. So I tied to build a colour profile that would correct this cross talk, no such luck. it wasn't until a lab scanned the cross processed  as colour positives effectively supplying me with colour negatives (excuse the brain twisting double negatives).

Examining the colour negatives curves it was plain to see that the rgb curves had a much different shape then normal and the centre of symmetry was offset and different shaped for each of the rgb channels when compared to a normal colour negative curve.

What does this mean:

That colour is dependent on and intertwined with intensity.
If you remove this dependency you get consistent slide to slide, roll to roll results.

If you let a lab scan your film you will get highly inconsistent results that depend how their automated scanner treats a cross processed image when expecting a normal colour negative..

If you want a consistent results you have to adjust every image at either at the scanning stage and/or in post.  Usually it's enough to correct white balance at 1/3, 2/3 and %100 white.

 The goal is not to get perfect white balance, if that was the target then why bother cross processing.

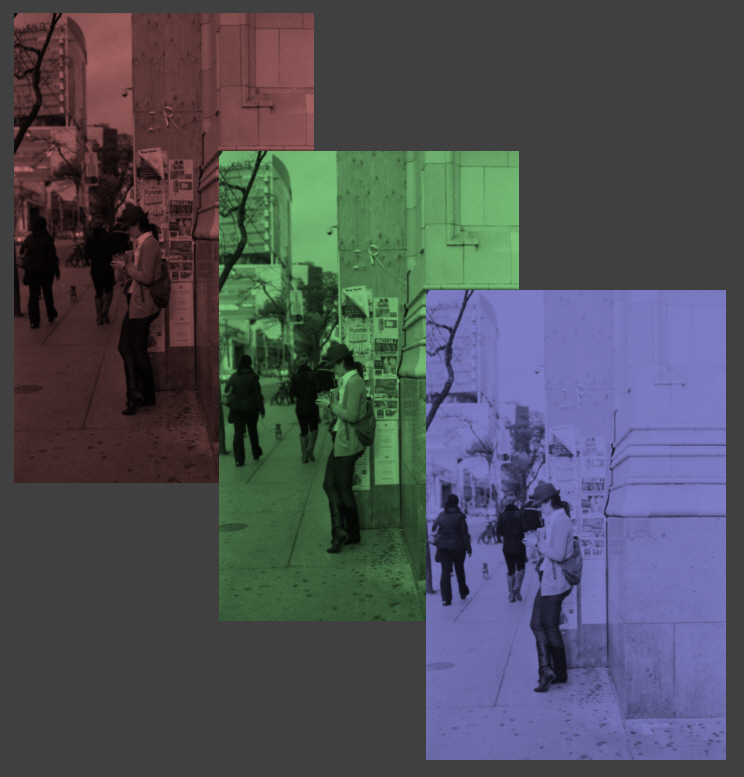
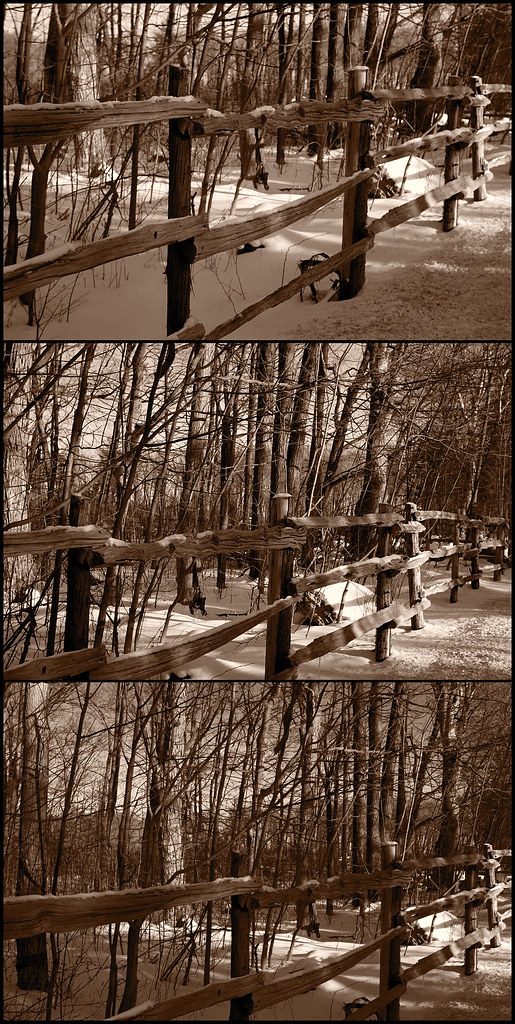
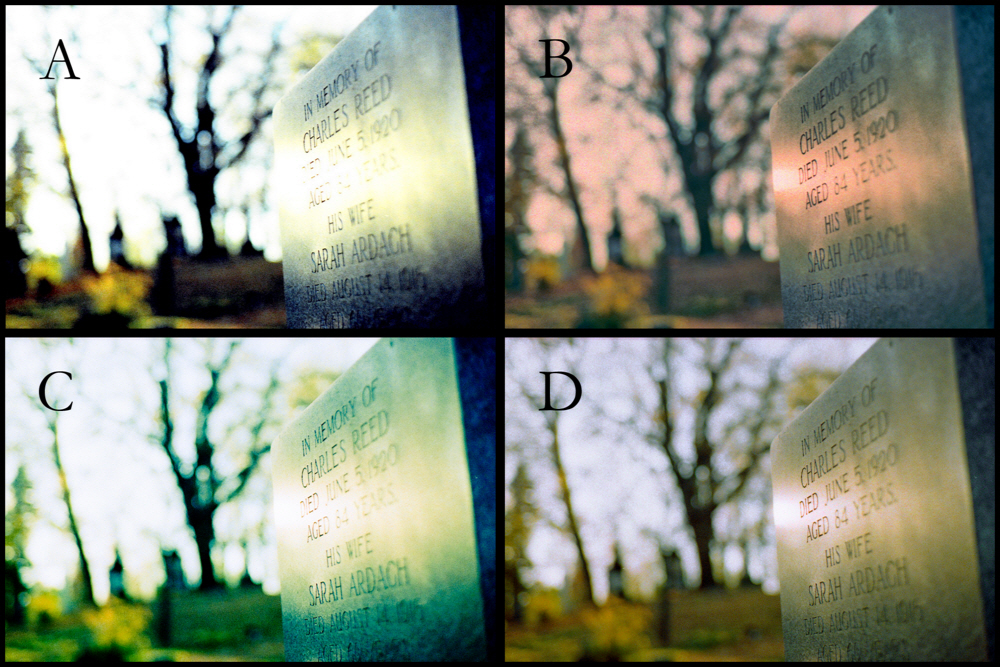
Whats with the ABCD in the above polytch using the same negative Kodak 64T expired 1997.

A is lab scan not too bad except for the blown highlights and lack of shadow detail.

B is scanning as a colour negative, good details an colours but hard to get the highlights as tungsten balance film has a tendency to have a lot of red noise in the highlights, this can be used to good effect  to give a gold look.

Legs

Mid Summer Dream
Kodak Ektachrome tungsten balanced film is my favourite film to crossprocess

C Scanned to give the expected digital cross processed look.

D is scanned as a colour positive and then colour reversed in post. This gives you the most control at the expense of extra time.
Note: Scans B,C and D were done on my Epson V500 scanner.

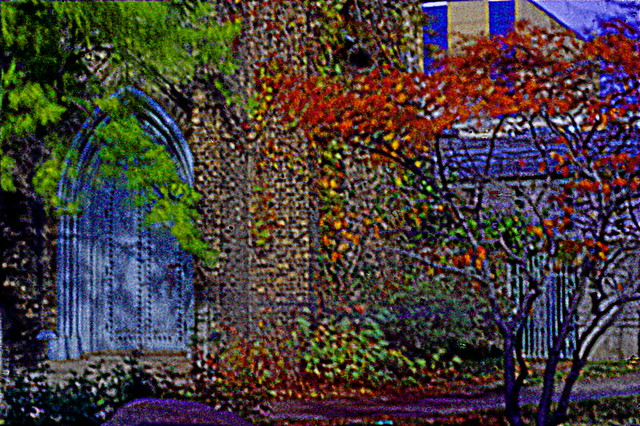
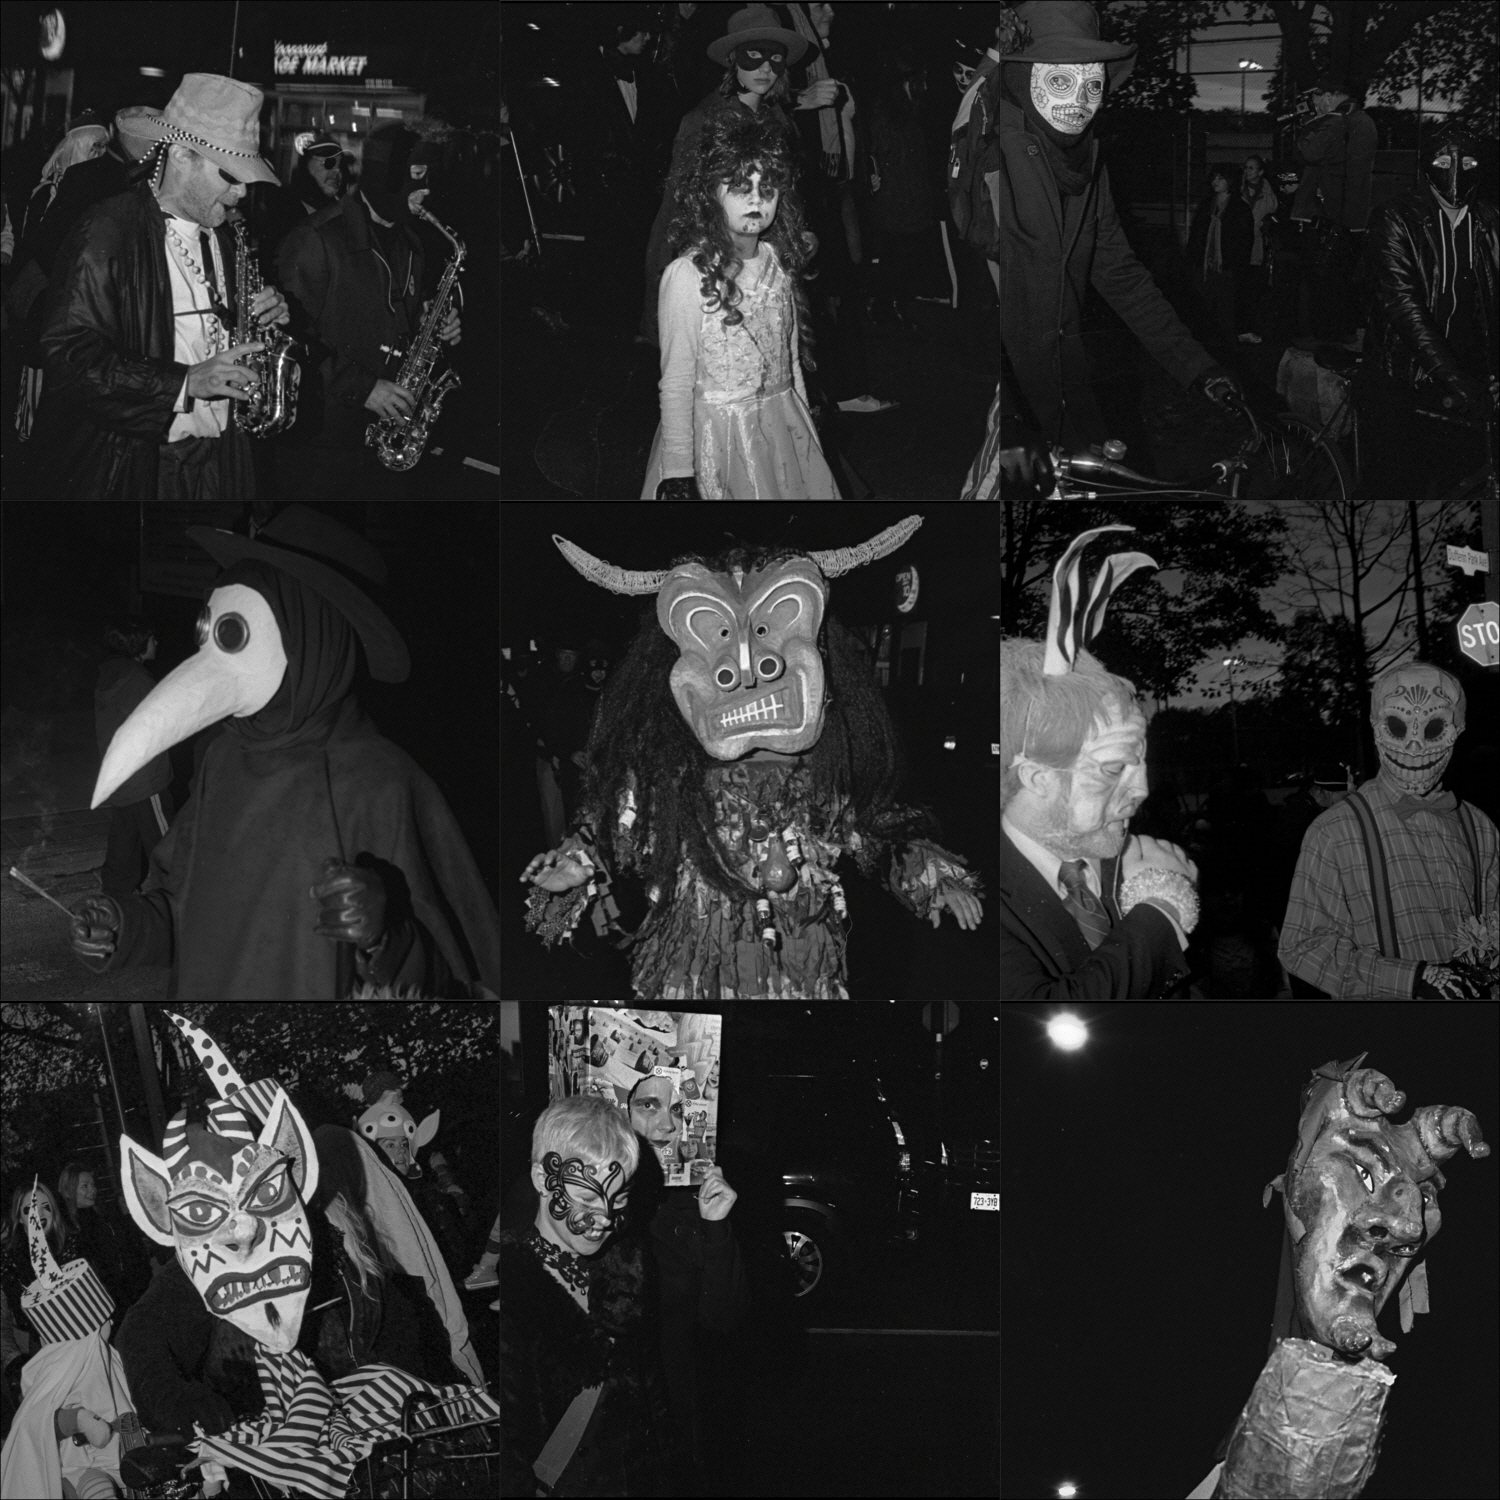
I cross process because I have cheap expired slide film and I like the surreal colour shifts even if it is at the expense of some colour bleed and lose of details. I really like Kodak Kodak Ektachrome tungsten balanced film is my favourite film to crossprocess because I can bring out golden highlights.

Lab Versus Y500
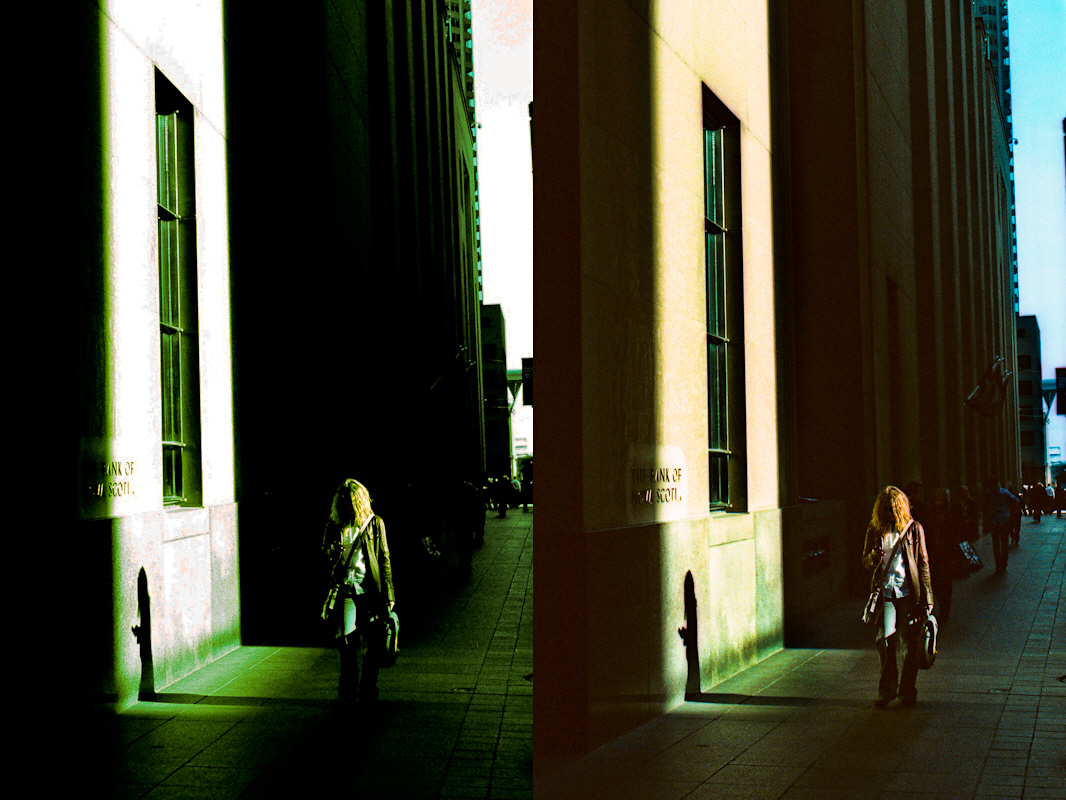
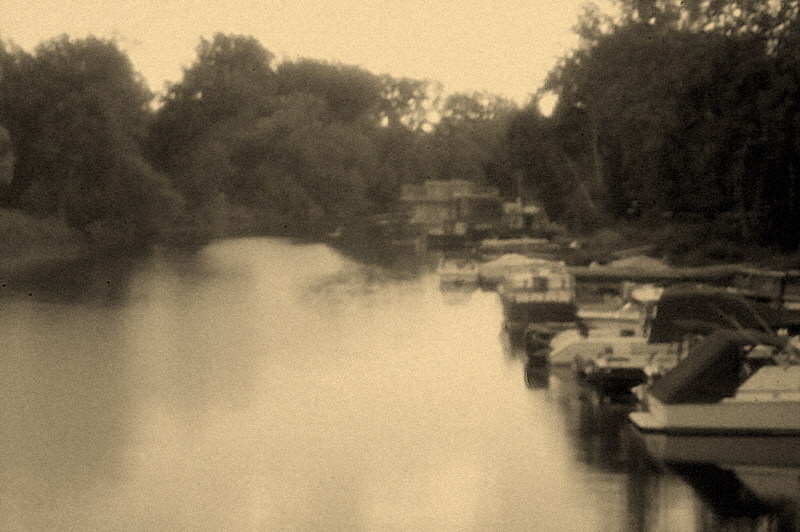
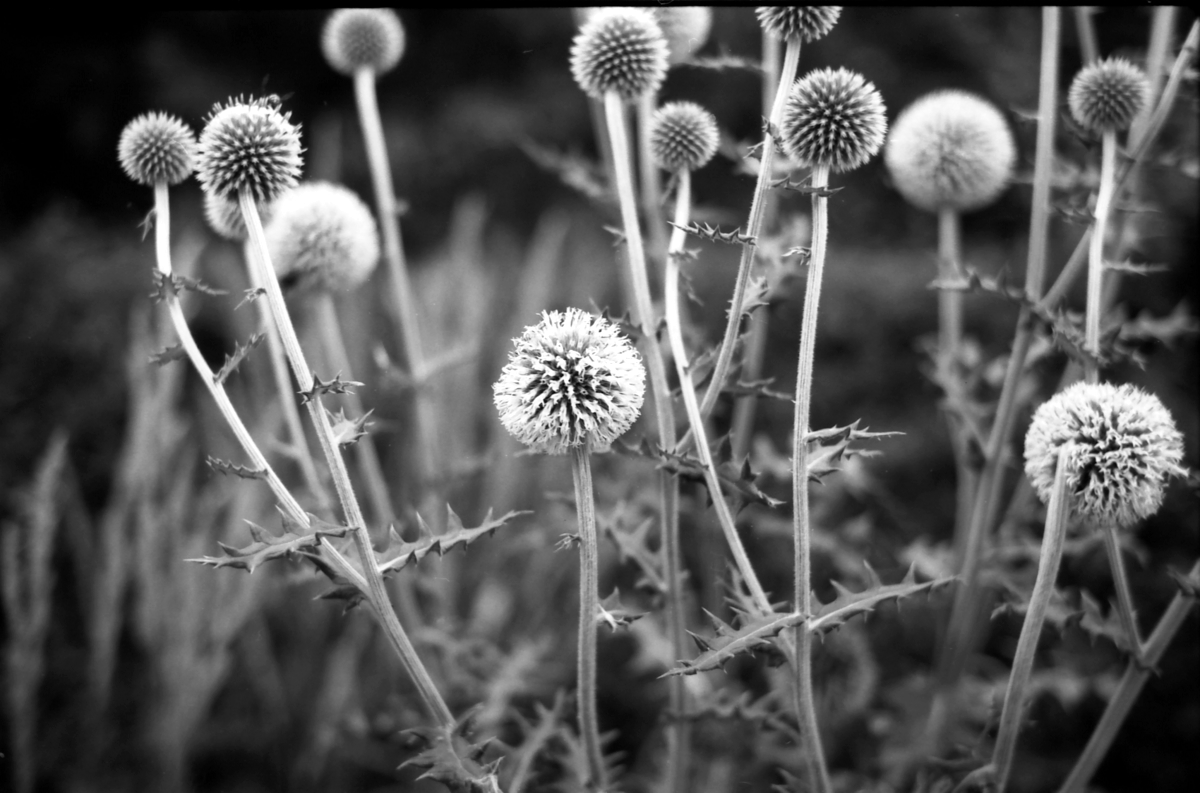
This expired  Fuji Provia 100f is not too bad it still has a good DMAX - DMIN. But of course with all expired film it has lost some shadow detail. By now  you should be able to guess which scan is the v500.


Springtime At The Necropolis
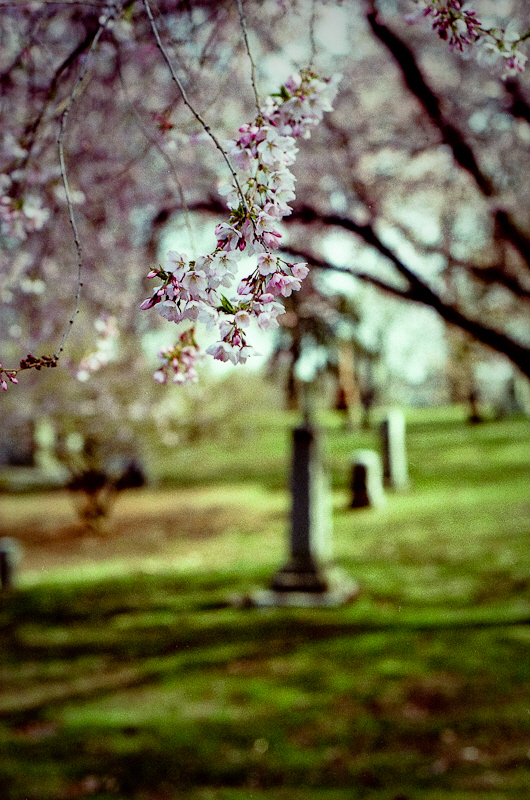
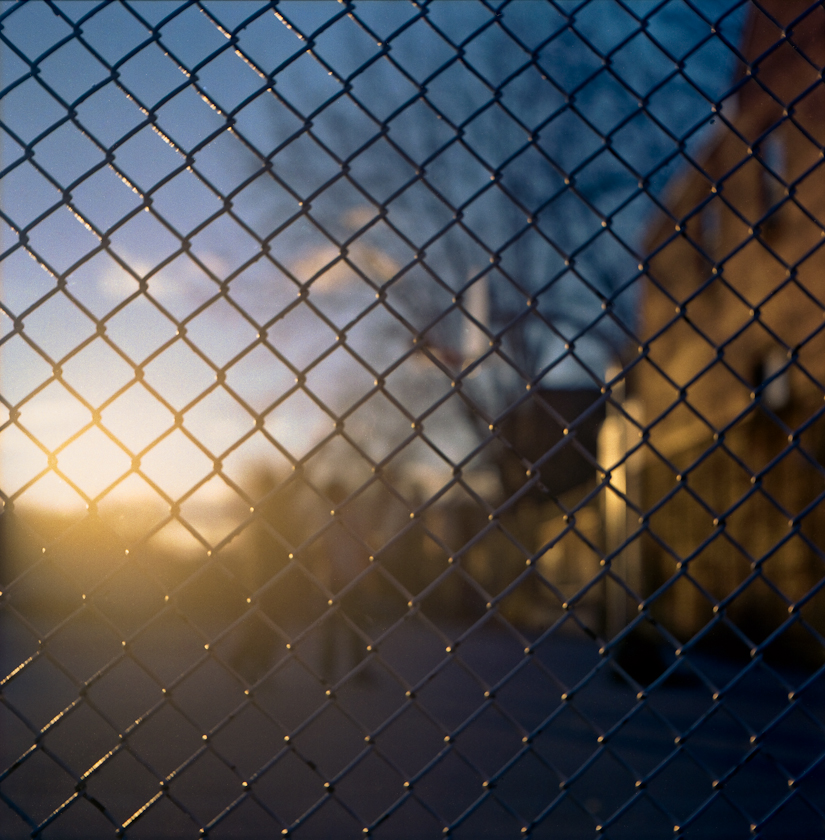
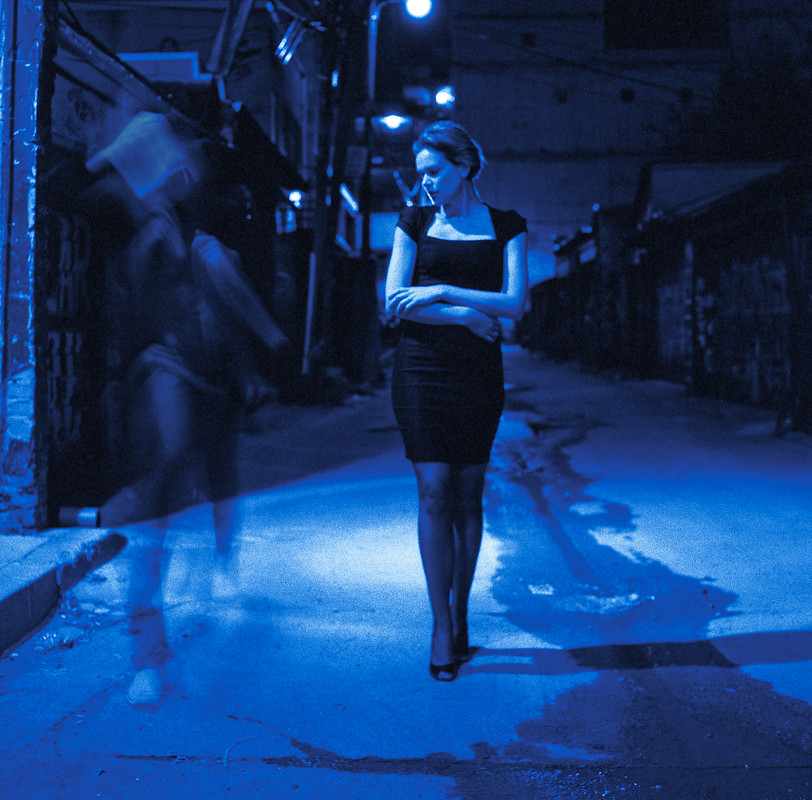
Cross processed Fuji Velvia 50 scanned as positive and then reversed by colour negation  in post. Velvia 50 is very difficult to scan directly as a negative because the DMAX-DMIN (dynamic range) of the film is so high.

If you disagree with anything I have said then there is nothing to stop you from doing it your own way:)

If you are bored you can have a look at a slide show  of my cross processed work on flickr

Thursday, February 08, 2007

Brash American 1956 Argus C44 versus Precise German 1952 Zeiss Ikon Contax IIIa

My second vintage camera in as many months. This is a dangerous trend!
Brash American 1956 Argus C44 versus Precise German 1952 Zeiss Ikon Contax IIIa
Lens German f2.8 versus German Zeiss f1.5
flash x-sync versus strange cable
Maximum shutter speed
1/300 versus 1/1250 of a second
Minimum shutter speed
1/10 versus 1/1
Meter
No versus Yes
Self timer
No versus Yes
Rangefinder
slight edge to the Zeiss
Smoothness of focus, film advance and speed
clunky versus as smooth as silk
Distance scale for hyper focal length
easy to read by looking down at camera versus badly placed hard to read scale.
Setting f stops
easy because end of lens does not rotate versus difficult because end of lens with f stop rotates making the controls rotate around the camera also because of the smoothness of the focus unless you lock the focus (easy to do) changing f stop could affect focus position.
Sound of shutter starter pistol versus silencer
Ease of changing lens
very difficult versus less difficult
Ease of loading film
better design and built in takeup reel versus removable take up reel and clumsy loading partially outside the camera
Cost
$55 versus $280
Fun factor Argus as the Zeiss is just too  precision crafted to use as a fun camera
Reliability  Zeiss still going strong but the Argus is dead  may it  RIP 
Image Quality You be the judge but I suspect the legendary Zeiss f1.5 will win out


Which is Which Canon 350D, 1956 Argus C44 and 1952 Zeiss Ikon Contax IIIa?
Which is Which: Canon 350D, 1956 Argus C44 or 1952 Zeiss Ikon Contax IIIa? 


Highway to Nowhere
Argus


Flag Man
Argus


"The Girls Never Stop"
Argus


Ivy Path
Zeiss


Sea Wall In Artic Aqua
Zeiss


Ilford ISO100 Test
Zeiss


Art Square
Zeiss

Answer to which is which lens question:

Top: 1956 Argus C4 50mm lens at f11 at 1/100sec
Middle: 1952 Contax IIIa at the same setting
Bottom: Canon 350D 24 - 105L set at 40mm equivalent f9 1/40sec with polarizer