Posts in Category: My Photography
Straight Out Of The Camera (SOOC) Photograph Of The Year (POY)
What does straight out of the camera actually mean?
purity and “SOOC” is bull! I especially hate some film or in some cases digital photographers that say things like “This is straight out of the camera, I don’t
believe in altering the image” or some such nonsense. What do they think
showing an image on the screen is besides an alteration, and believe me
there is nothing natural about scanning or the guts of a DSLR. Read here for another take.
On my part I consider the taking of the photograph the most important part and what comes later just window dressing.
The Shaw-Pellegrin Controversy Around The Photographer Of The Year Awards
this year’s World Press selections for photograph of the year.
www.designboom.com/art/world-press-photo-2013-image-alter…
www.theverge.com/2013/2/20/4009724/photo-contest-winner-c…
www.petapixel.com/2013/02/19/why-do-photo-contest-winners…
Everybody loves a real life soap opera. This is a failure of
the editing process for photojournalism, what ever happened to fact
checking?
Not to side with Pellegrin but his I’m a blogger not a reporter reasoning
is some what of a cop-out while his hiding behind being a critic might be a
more valid reason.
I think the bigger picture is the partial lack of standards for the POY
organization. It’s not as though this is the Oscars but it is looking
more and more like show business. Hopefully next year might be
different:
lens.blogs.nytimes.com/2013/02/28/prize-winning-photos-an…
It’s not as though there aren’t any standards for “SOOC” at least for reporters. It’s a pity that the POY didn’t know about them until after the 2012 awards:
Interesting that the last photo in the above article wouldn’t even pass:
A handbook of Reuters journalism
A guide to standards, style and operations
Photoshop and how to use it
Photoshop is a highly sophisticated image manipulation programme. We use
only a tiny part of its potential capability to format our pictures,
crop and size them and balance the tone and colour. For us it is a
presentational tool. The rules are – no additions or deletions, no
misleading the viewer by manipulation of the tonal and colour balance to
disguise elements of an image or to change the context.
 |
| Reporter |
I will leave you with some famous quotes:
“To quote out of context is the essence of the photographer’s craft”
“You see something happening and you bang away at it. Either you get what you saw or you get something else– and whichever is better you print.”
“The photograph should be more interesting or more beautiful than what was photographed.”
“The photo is a thing in itself. And that’s what still photography is all about.”
 |
| Blood On Their Hands |
Analog As Opposed To Digital
Why do many film photographers get upset with the term analog photography?
If the analogy to electronics doesn’t appeal to you then you might want to consider the original more general pre-electronics era meaning of similar to or proportional to as being more appropriate to photography. Actually that makes a lot of sense as a photograph could be seen as a proportional projection of the original scene.
More serious misnomers exist for example how about using the Sloth a South American animal as a model for one of the seven deadly sins? The sloth slow metabolic rate is a survival trait and does not deserve to be called a deadly sin.
 |
| Neon Sign, New Building And Falling Steam
But we decide which is right. |
Photography Year 2012 In Review
2012 Was The Year Of The Dragon

 |
| Gone Walkabout Up Country As Almost No Snow In Toronto |
 |
| Toronto Islands In January |
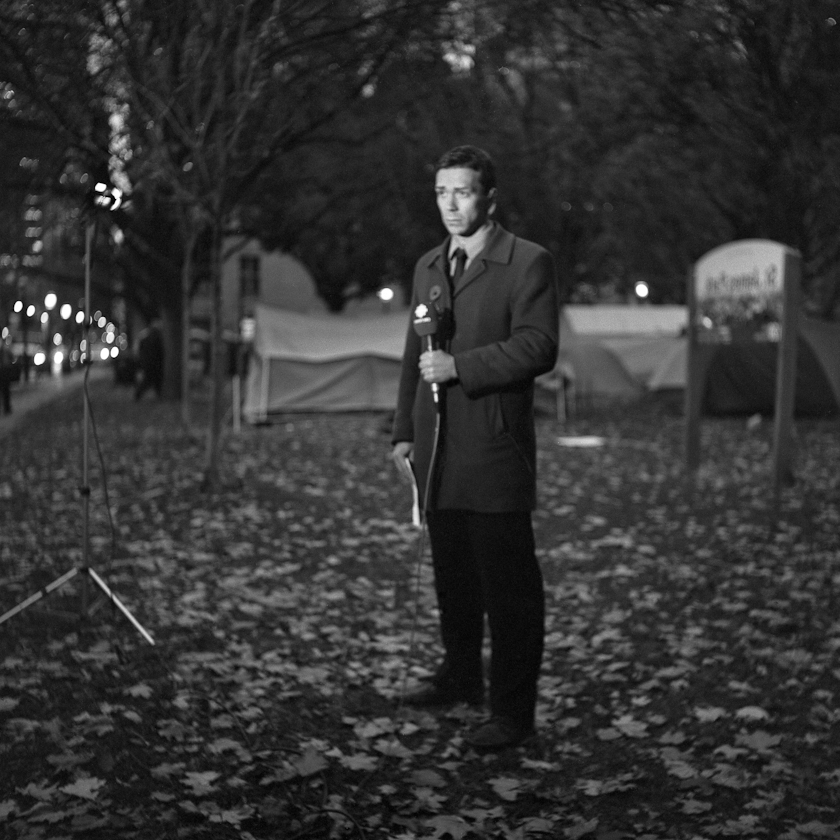
The Diffusion Of Occupy Toronto Into The Collective Memory


Trying Out a Couple of New For Me Medium Format Cameras
 |
 |
| From The Mamiya RZ67 |
 |
| Hasselblad 500cm |
In and Around the Streets Of Toronto

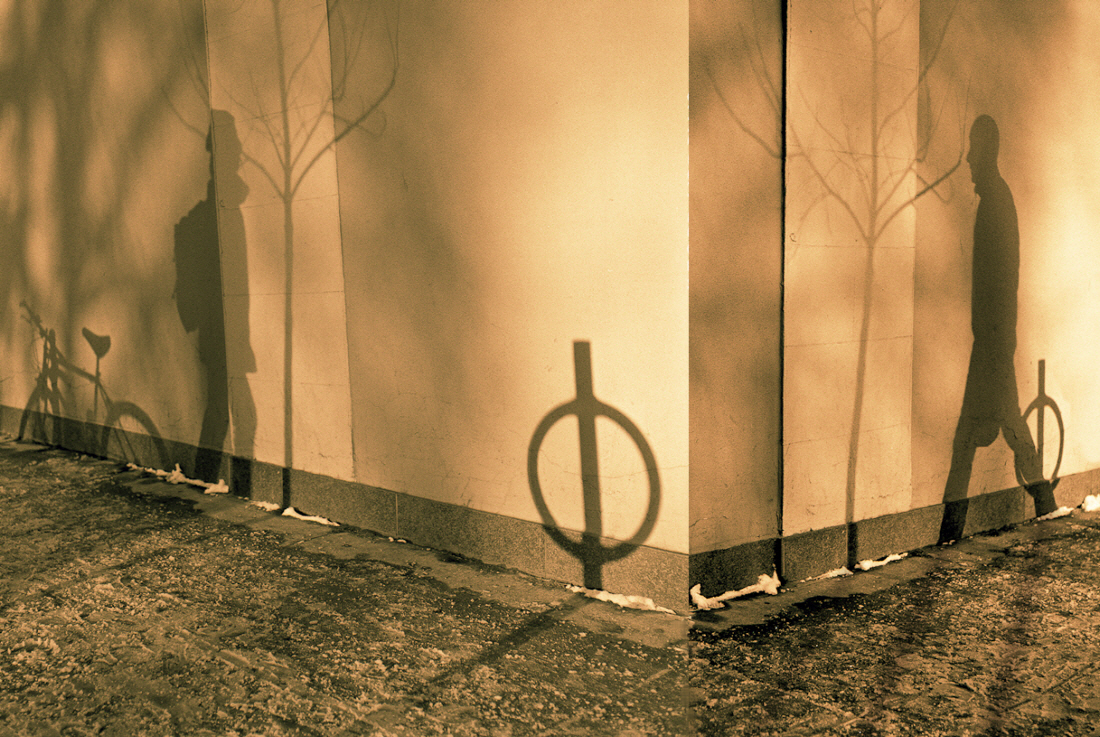


A Couple Of Double Exposures For Old Times Sake


In And Around The Streets Of Paris


Some Portraits And Modeling


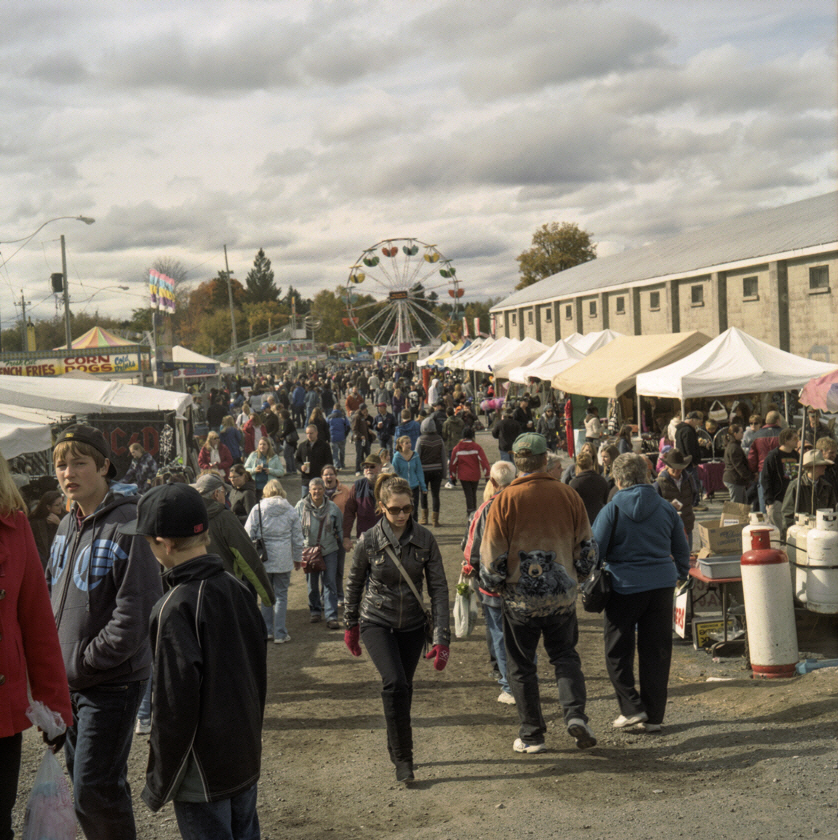
Some Countryside


The Year Wouldn’t Be Complete Without Some Strangeness


Developing Film And Water Spots
Following on from my blog posting titled Odds and Ends In B&W Film Development I thought I would continue with the topic of the final rinse.
Final Rinse Update – In the past I had spots now none:
The final rinse is 3 minutes in distilled water; After the 3 minutes I
then add 1 drop of Edwards LFN wetting agent.; Shake really well for 5 seconds, wait until any foam dies down; Then remove film from
liquid. Shake off excess water and hang to dry.
Absolutely no spots!
Notes:
The distilled water adds about $0.15 per roll but it seems to be worth it, The trick seems to be prior to adding the wetting agent leave the film in the distilled water for long enough to dilute (replace) any of the tap water in the emulsion.
Over washing and washing the film like a raccoon can do irreparable damage to the emulsion.
Obviously if you get white spots with tap water you need distilled for the final rinse if you don’t get them then you don’t.. And of course negatives without white spots and drying marks are better than those that have them.
I did an experiment watching under a microscope one drop of distilled water and one drop of my tap water dry on a microscope slide. Absolutely no observable difference! So why use distilled water? Distilled water removes most minerals from the film gelatin layer so it doesn’t come to the surface later and cause water marks when it drys. The final rinse must be long enough for the gelatin to become in equilibrium with the rinse water. The reason I reuse the same “distilled” water from the final rinse for the photo flow or wetting agent stage is that I want the water within the gelatin to be in equilibrium with the water that has the wetting agent. This and a short cycle time with good agitation keeps the wetting agent surfactant mostly on the surface where it belongs.
It’s all about chemistry, surface chemistry, diffusion and equilibrium.
Why not dishwashing soap instead of a wetting agent? Because it’s a false economy and they contains impurities, contaminants that could cause problems. Wetting agents designed for film do not have the extra impurities that are added to dish water soaps and are only a couple of pennies per film.
Tip:
Sometimes I find stuff floating in my developer or fixer, to remove pore the liquid through a small fine stainless sieve used for cooking. Don’t forget to rinse the sieve after using to prevent corrosion.
Drying
I recently I brought an old Kindermann Rapid dryer. I then taped a dust and pollen filter over the fan air inlet so for a total cost of $20 I can now have dry, dust and spot free film ready to scan within 45 minutes of development.
There are many DIY dryers out there on the web including those made with garment bags. This MacGyver like method although I haven’t tried it yet, it looks brilliant!
Warning
References
Vuescan, Lightroom and DNG Plus The Lomography DigitaLIZA
 |
| Fall Path |
My blog on Plustek scanner mentioned my purchasing of the scanner software Vuescan to replace the software that came with the scanner. Up to now I have avoided using it for my epson v500 as I find the epson scanner software very easy to use. For a change I decided to try the Vuescan DNG output. DNG is equivalent to a RAW file only in a Adobe format. This turns out to have several advantages if you happen to own Lightroom or Photoshop.
- You don’t have to fuss with scanner settings for each individual image (Just set gain and base colour on an unexposed part of the negative once per roll)
- You can extract and save all the information that the scanner can provide in a standardized archival form
- Fits into Lightroom’s non destructive workflow so reprocessing does not degrade the scan.
- Merges your film and digital workflow
- You can make and apply your own colour profiles, curves, fx and other post processes as many times as you want
- You start out with a RAW file that has more information and less noise then a conventional tiff scan with some curves applied during the scanning phase
Warning the Vuescan DNG has a linear gamma of 1 the same as a scanner so opening up a file out side of a gamma aware program will result in an image seeming to have a very strange contrast curve.
New note on Vuescan/Epson V500 here.
For Pixel Peekers
Have a look at this example of 35mm Nikon FMn2 105mm hand held street portrait on HP5 film developed in Xtol + Rodinal and scanned on my Plustek 7400
 |
| Original scan from the Plustek B&W scanned as a 48 bit tiff |
 |
| 1:1 with some slight sharpening in post |

Lomography DigitaLIZA
I have to give the Lomography DigitaLIZA 120 Format film holder a 4 out of five rating compared to the epson holder 2.4/5 rating. It’s so much better for keeping curly film flat. It’s also easy to load the film.
Tips:
- For the digitiliza make up a template that you can place on your scanner bed to make it easy to align the Digitaliza with the scanner bed (I made mine out of a stiff cardboard looks like a thick L) be careful not to cover the calibration area of the scanner
- I use a rocket blower rather then canned air to blow any dust off the negative.
- A pair of silk inner liner gloves (from a sports or outdoor shop) are much better then cotton gloves for handling negatives

What Is And What Isn’t Street Photography?
personal because I don’t believe a formal definition of what is and what isn’t
Street Photography does anything except to fix firmly in the past our idea of
what street photography should be.
what is Street Photography:
- Urban
environment - Range
of distances: from up close and personal to across the street. (Across the
street being more urban life scene less traditional street.) - The
subject should scream life and humanity all those personal quirks and
everyday little and big things that make us human - The
subject does not have to be a person or persons regardless it does have to
evoke an image of humanity - There
has to be some transit nature to the subject. An example: A half eaten ice
cream cone melting on a pavement evokes memories and tells a story - Generally
the single photograph should stand by it’s self even when it’s included in
a larger photojournalist type story. Whether or not the single image shows
truth in the photojournalist sense is not relevant.
Definition of What Definitely Isn’t Street Photography (doesn’t mean I
won’t take the shot any way)
- Beach
scenes; nature scenes, country roads; Architecture, statues and art as the
primary subject. - Static
objects including empty streets (too obvious and trite) although fog
street scenes are tempting - Road
traffic where the cars, trucks … are the subject even is it’s a long
exposure and shows pretty light painting effects - Too
much staging although I hate getting into the street portrait debate
- Sometimes
a backside is just a backside and a snapshot is just a snapshot, trite is
trite in whatever guise - Geometric
organizations and patterns, can be really interesting but if too clinical
and clean without the grit it’s more of an abstract - Sometimes
a sign mixed with people work as street, it depends if the subject is the
people rather then mostly the sign.
Most important: If you see a shot take the shot! If you take a shot then consider staying a minute or two and taking another the shot from several different positions and angles. Worry about any definitions of what is or is not street afterwards,
By my definition here are some borderline Street photographs. Except for
the first one they all came from the same roll of film. Remember there is
no right or wrong answer.
 |
| Robocall: “Democracy Can Kiss My Shiny Metal Ass” |
 |
| Body Language |
 |
| Freshly Squeezed |
 |
|||
| At The Bay |
New Kodak Portra 400 Beautiful When Pushed One Stop – Review Update
In my first review of the new Kodak Portra 400 I had one negative about the film
Cons : Needs post processing to bring out contrast
Turns out there is a splendid work around: Unlike most other colour negative films Kodak Portra 400 shooting at ISO 640 and developed pushed 1 stop in normal C41 chemistry really brings out the contrast and colors. These days this is my preferred way of using the film. The dynamic range (contrast ratio) is increased at the expense of a slightly decreased latitude. In addition an extra 2/3 to a stop of increased ISO really helps out in hand holding medium format cameras.
Beware that unfortunately not all labs will correctly push c41 films.
 |
| Kodak Portra 400 Shot at ISO 640 and pushed one stop in C41chemistry |
Faux Cross-Processing
Cross processing is simply developing film in a different process then it was intended to be processed. The most common type of cross processing is developing slide film as colour negative film. Normal slide film is processing is called E6 and normal colour negative film processing is called c41,
If you are interested here is a slide show of some of my slide film cross-processed in c41.
Also here is my blog posting exposing some of the myths of cross-processing:
Now days there are plenty of actions that try to duplicate the “Cross-processed” look. But it turns out much of what we consider the cross processing look and feel
is as a result of a lab scan as opposed to a printed photograph. Mini lab scanners when scanning cross processed film as a
normal c41 assumes a nonexistent orange base plus a normal
colour channel gamma.
I am interested in duplicating the look of cross processing by back engineering a normal image back to a faux cross processed negative. Just for fun after scanning I converted a
Portra 400 negative film to a cross processed slide by reversing the
result and then reversed the negative back to a positive assuming a
none existing orange base that a regular negative film would have.
This is my first attempt in using a model rather then a canned action:
 |
| Original Photo |
 |
| Faux Cross Processed |
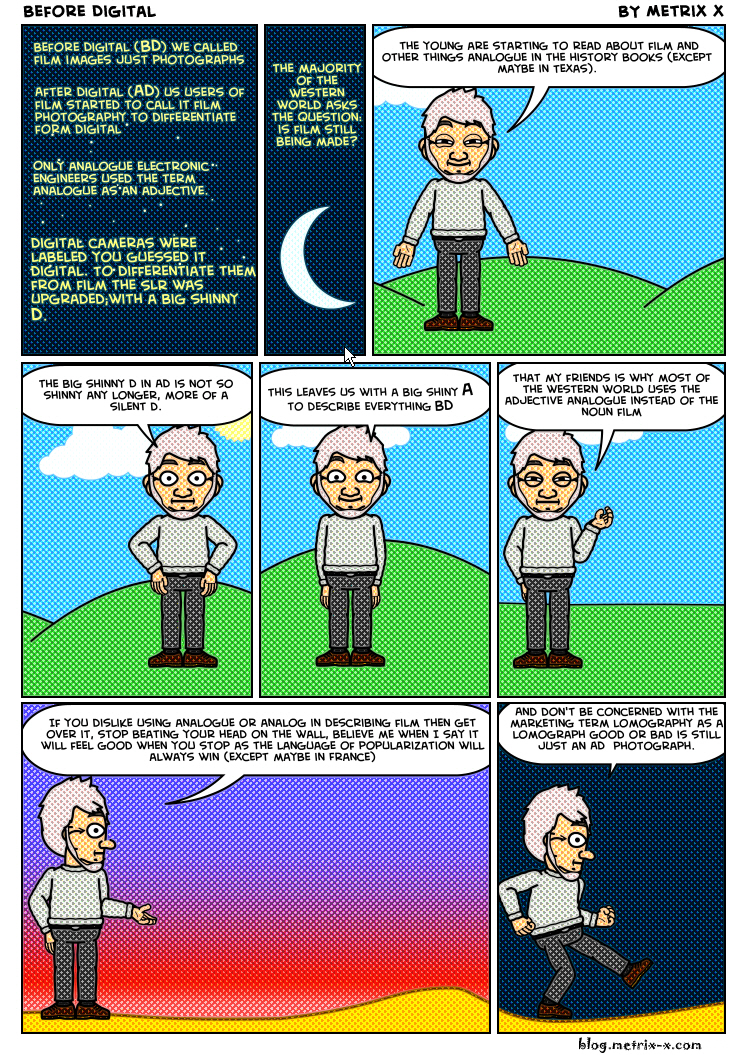
Before There Was Digital and The Naming Of Photographers
The Naming Of Types
(Stolen and poorly adapted from T. S. Eliot)
The Naming of Types is a difficult matter,
It isn’t just one of your holiday games;
You may think at first I’m as mad as a hatter
When I tell you, a photographer must have THREE DIFFERENT NAMES.
First of all, there’s the name that the family use daily,
Such as Snapshot, Wedding, Nature, Macro or Travel
All of them fun everyday names.
There are fancier names if you think they sound sweeter,
Some for the gentlemen, some for the dames:
But I tell you, a photographer needs a name that’s particular,
A name that’s peculiar, and more dignified,
Else how can he keep up his tail perpendicular,
Or spread out his whiskers, or cherish his pride?
Of names of this kind, I can give you the most accordant
That name is of course Photojournalism.
A name that is a beacon for both truth and realism
With the names Bokeh and Sharpness being of much lesser importance
But above and beyond there’s still one name left over,
And that is the name that you never will guess;
The name that no human research can discover–
But THE PHOTOGRAPHER HIMSELF KNOWS, and will never confess.
When you notice he or she is in profound meditation,
The reason, I tell you, is always the same:
His mind is engaged in a rapt contemplation
Of the thought, of the thought, of the thought of his name:
Of all the names his is the smartest,
His ineffable effable
Effanineffable
That of course is because he’s an Artist
Of deep and inscrutable singular Nature.
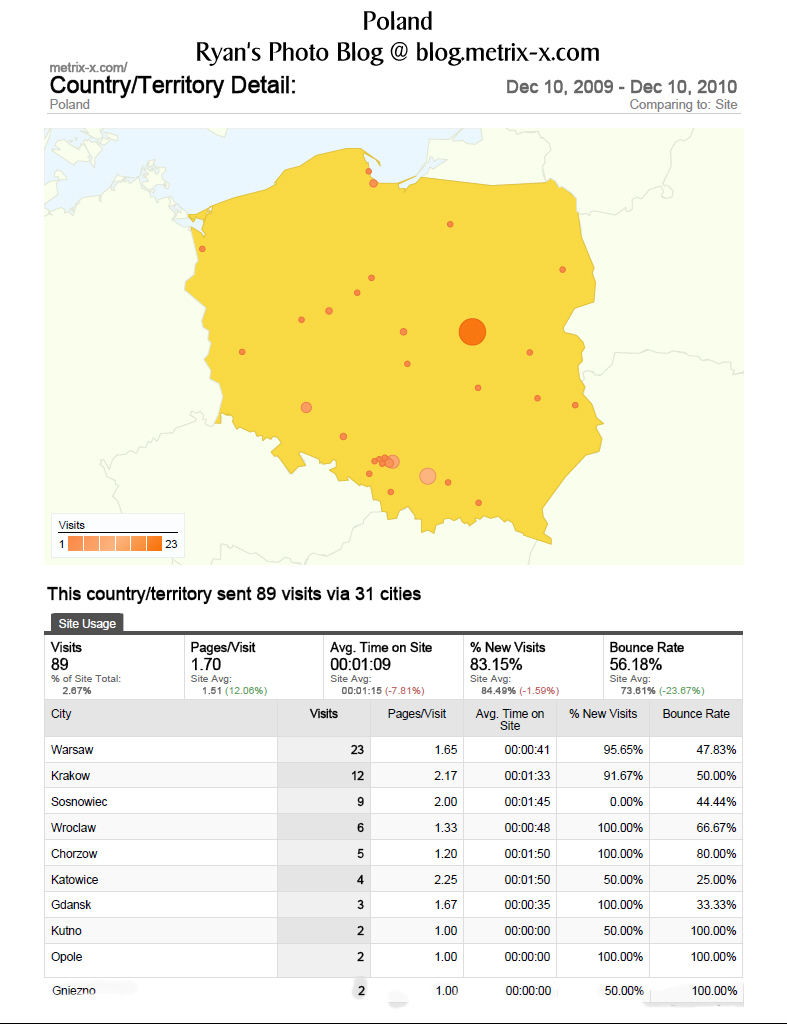
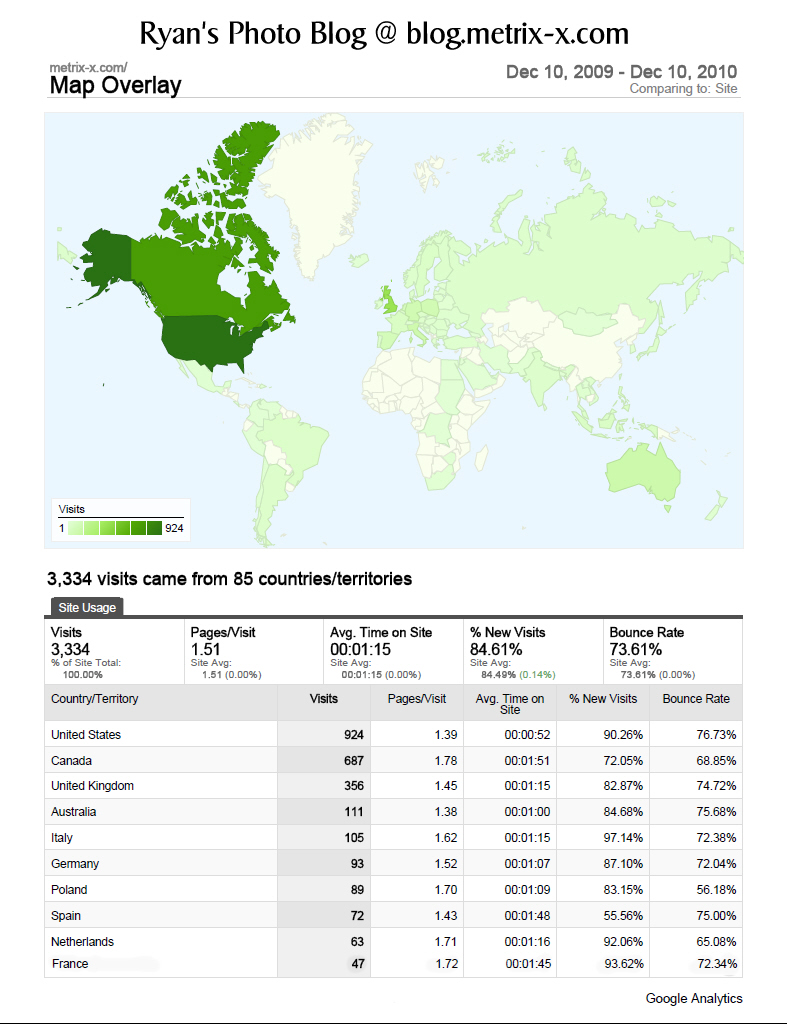
Google Analytics 8 Months On The Path To World Domination
My Photo Blog at blog.metrix-x.com has been hosted by Google for 8 months now so the data is 4 months shy of a year. The interactive maps are one of the more interesting aspects of using Google analytics to track visitors. From the world map you can click down to the country and then down to the specific town.