Faux Cross-Processing
Cross processing is simply developing film in a different process then it was intended to be processed. The most common type of cross processing is developing slide film as colour negative film. Normal slide film is processing is called E6 and normal colour negative film processing is called c41,
If you are interested here is a slide show of some of my slide film cross-processed in c41.
Also here is my blog posting exposing some of the myths of cross-processing:
Now days there are plenty of actions that try to duplicate the “Cross-processed” look. But it turns out much of what we consider the cross processing look and feel
is as a result of a lab scan as opposed to a printed photograph. Mini lab scanners when scanning cross processed film as a
normal c41 assumes a nonexistent orange base plus a normal
colour channel gamma.
I am interested in duplicating the look of cross processing by back engineering a normal image back to a faux cross processed negative. Just for fun after scanning I converted a
Portra 400 negative film to a cross processed slide by reversing the
result and then reversed the negative back to a positive assuming a
none existing orange base that a regular negative film would have.
This is my first attempt in using a model rather then a canned action:
 |
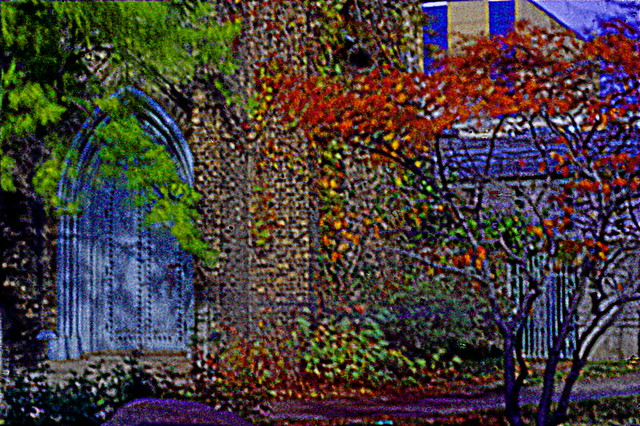
| Original Photo |
 |
| Faux Cross Processed |
My First Look At the Plustek 7400 Film Scanner
P.S. After using the scanner for a few months the quality of the scans has motivated me to shoot more 35mm film.
For Pixel Peekers
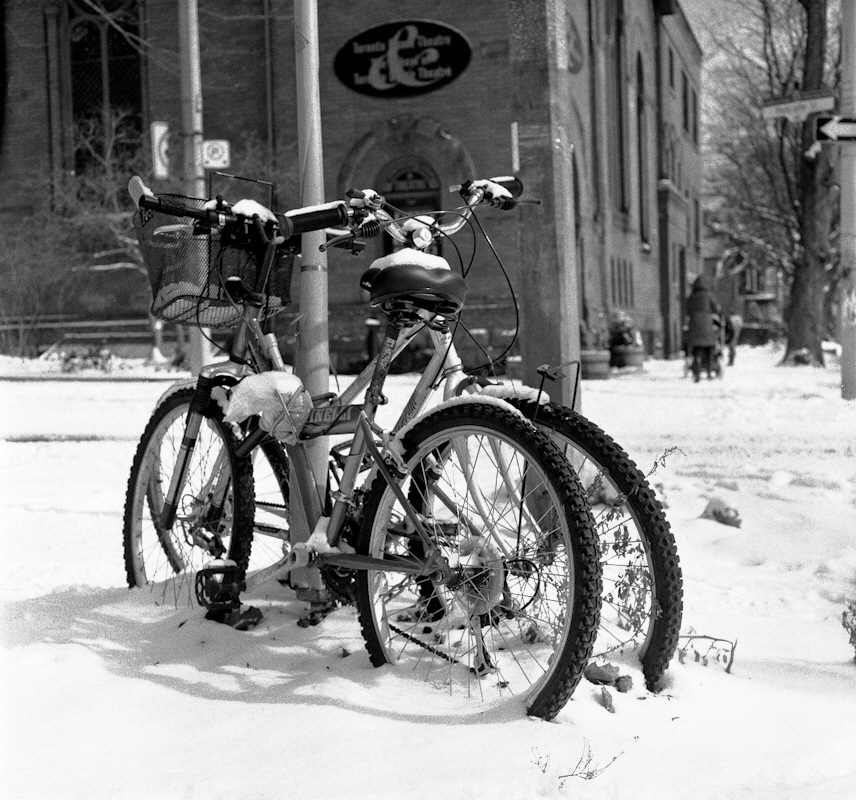
Have a look at this example of 35mm HP5 developed in Xtol + Rodinal scanned on my Plustek
Top 10 Signs That You Have Gone Too Far When Photoshopping A Photograph
We all know that art has no boundaries so how do you know when you have gone too far with the Photoshopping of a photograph? To help you out I have compiled a list of the top 10 warning signs:
Top 10 Warning Signs That Let You Know That You Have Gone Too Far With Photoshopping An Image
10. Only your parents would put it on their wall and you find out later that they take it down when you are not there
9. Young boys want to have a black light poster made of your image to hang on their bedroom door
8. Young girls think it’s cute
7. You think it’s cute
6. People you don’t know give you crop or cloning suggestions
5. People you know give you crop or cloning suggestions
4. Someone says your work reminds them of another person, and it turns out that you can’t stand that other person’s work
3. Someone wants to know what HDR program and Photoshop actions you used
2. Someone buys it and asks to have it framed in gold and matted with black velvet
1. Somehow it reaches the top 10 in Explore on Flickr
Last Supper Redux
 |
| Roll Over The Image With Your Mouse To See The Original |
You spend your hard earned money to pay for a trip to a far away place where no one really knows English just to wait in line to buy a ticket and when you finally get in you find that famous painting you heard so much about is faded, dull and chipped, it looks terrible by today’s digital standards.
Fear not as today I will teach you the secrets of restoring these old “masterpieces” from dull and lack luster to the way they should have been in the first place that is if the painter had had any proper art school training.
As an example I will use the painting the Last Supper done by a moderately successful painter (I forget his name at the moment):
Clearly in those days they never heard of the rule of thirds. At first I wanted to crop the image to make the subject Jesus conform to the rule of thirds. But then I realized I could not do a very nice roll over if the before and after images were of different sizes, besides cloning out the odd arms would be far too much work. So instead I opted to use selected focus. Using selected focus allows me to draw the viewer’s eyes directly to the subject clearing up all those busy distractions that make the eye wander about. What was the artist thinking wasting his time on all those unnecessary details? Selective focus also gives the painting a depth of field and 3 dimensionality that the original lacked.
To increase the feeling of magic and fantasy and to repair the chipped paint I applied an Orton Effect filter/action. The Orton filter I applied came with a set of 10 other actions which I purchased from WeripUoff at only $180. I highly recommend them as they save you a lot of time learning stuff.
Then to give it a more modern update look I applied a cross processing action (good value at only $80 from WeripUoff). Noticed the richness of colour. The hills in the background window are now a pleasant shade of Irish green.
Still it didn’t quite pop so for the final touch I applied a subtle single image auto HDR tone mapping, notice how much better the light is on Jesus’ robes when compared to the original. A bit expensive at $260 for the HDR package from WeripUoff but how can you be state of the art without the latest and best tools. Also consider the money you are saving and the disappointment you are avoiding by not travelling to view the original artwork.
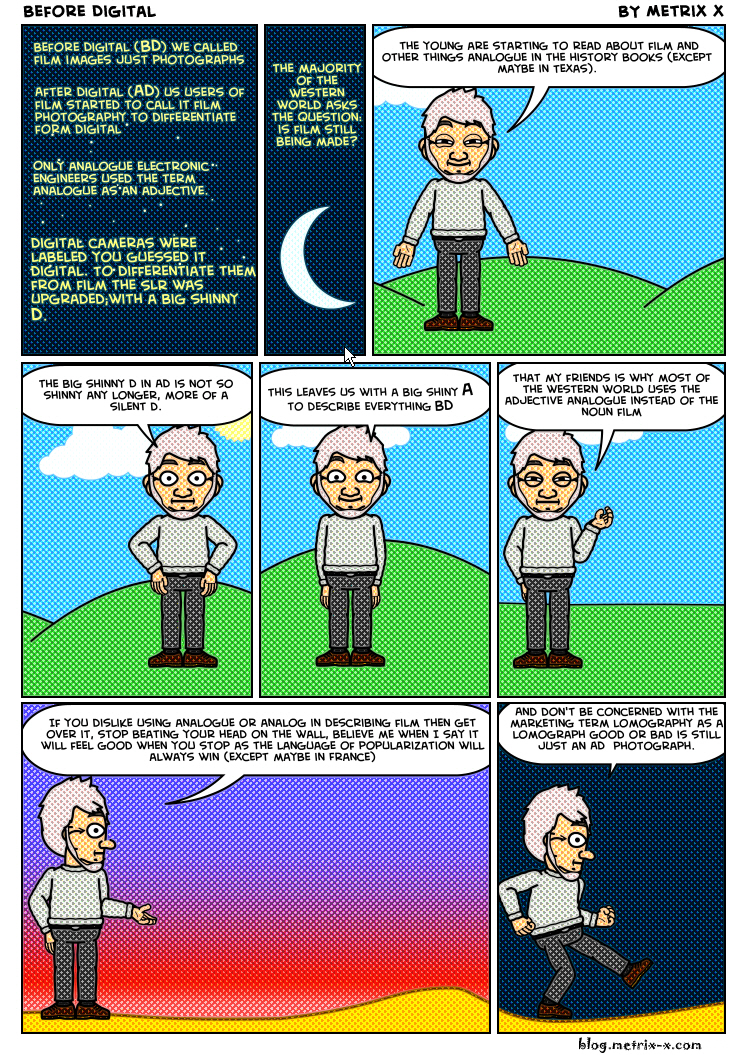
Before There Was Digital and The Naming Of Photographers
The Naming Of Types
(Stolen and poorly adapted from T. S. Eliot)
The Naming of Types is a difficult matter,
It isn’t just one of your holiday games;
You may think at first I’m as mad as a hatter
When I tell you, a photographer must have THREE DIFFERENT NAMES.
First of all, there’s the name that the family use daily,
Such as Snapshot, Wedding, Nature, Macro or Travel
All of them fun everyday names.
There are fancier names if you think they sound sweeter,
Some for the gentlemen, some for the dames:
But I tell you, a photographer needs a name that’s particular,
A name that’s peculiar, and more dignified,
Else how can he keep up his tail perpendicular,
Or spread out his whiskers, or cherish his pride?
Of names of this kind, I can give you the most accordant
That name is of course Photojournalism.
A name that is a beacon for both truth and realism
With the names Bokeh and Sharpness being of much lesser importance
But above and beyond there’s still one name left over,
And that is the name that you never will guess;
The name that no human research can discover–
But THE PHOTOGRAPHER HIMSELF KNOWS, and will never confess.
When you notice he or she is in profound meditation,
The reason, I tell you, is always the same:
His mind is engaged in a rapt contemplation
Of the thought, of the thought, of the thought of his name:
Of all the names his is the smartest,
His ineffable effable
Effanineffable
That of course is because he’s an Artist
Of deep and inscrutable singular Nature.
Silver Alchemy – Xtol Plus Rodinal
There is a certain modern retro look that I have in my mind for a portrait project I have in the works. The Lomo 120 ISO 100 film AKA Shanghai GP3 looks like a possible film for the project For the developer I would like to use Xtol. Xtol looks good but seem to lack a bit of an edge. Xtol’s primary component is vitamin C and vitamin C is compatible with Rodinal. The idea (from apug) is that a pinch of Rodinal in Xtol adds a bit of edge definition which is normally absent because of the solvent action of the Xtol. So this might be just what is needed.
http://www.unblinkingeye.com/Articles/Rodinal/rodinal.html
http://www.apug.org/forums/viewpost.php?p=959820
New update on the process can be found here: silver-alchemy-xtol-plus-rodinal-part-ii
It’s a balance between grain and highlights with the Rodinal and shadow detail with the Xtol. The 2 developers just happen to be chemically and PH compatible. But Xtol is a solvent compensating developer while Rodinal is not.
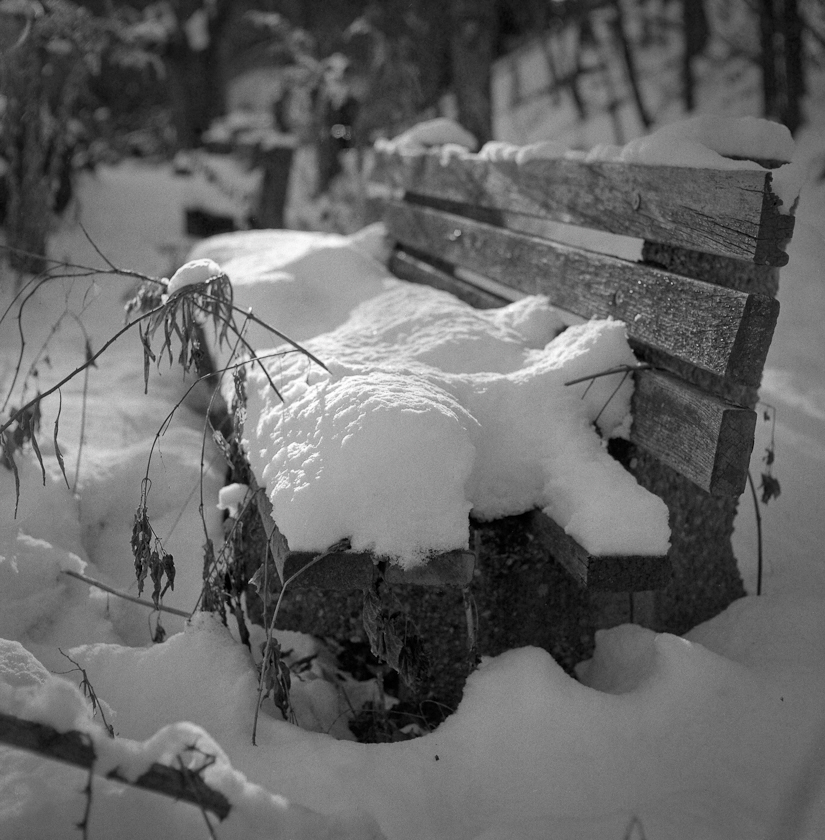
I use around a 2 minute water presoak at the same temperature as the developer and standard agitation (first 30 seconds and a couple of seconds every 2 to 3 minutes thereafter). So far in an unscientific sampling it looks like I’m on the right track. Very happy with the results:
 |
| Kodak TMAX 400 “Xtol 1:2 + Rodinal 1:112 for 10.5 minutes 19c” Xtol was meant to be the dominant component yet with the tmax 400 I can see a definite difference in the highlights over xtol alone. I know by my scanning histograms compared to previous work with xtol and TMAX that the DMAX has increased with more highlights and midtone details then what would normally be seen with xtol alone while the shadows are pretty normal for xtol 1:2. |
 |
| Fuji Neopan 400 “Xtol 1:2 + Rodinal 1:112 for 12.5 minutes 19c” It is less clear that there is any benefit to adding Rodinal to Xtol when developing Fuji Neopan 400 at box speed. I suspect that because it is easy to block shadows with Neopan 400 at box speed using 1:2 Xtol instead of my normal 1:1 Xtol the shadows are closing obscuring any benefits of adding the Rodinal. Upping the Xtol to 1:1 seems to give better results. |
 |
| Neopan at 400 souped in xtol 1:1 plus rodinal 1:112 for 9 minutes19c |
 |
| HP5 at 400 souped in xtol 1:1 plus rodinal 1:135 for 9.5 minutes19c HP5 is a difficult nut to crack The first time was far too grainy. The second time worked much better very sharp maybe even too much acuity. |
 |
| Shanghai GP3 developed in Xtol 1:2 + Rodinal 1:112 for 15 minutes at 19c. |
 |
| Shanghai GP3 developed in Xtol 1:2 + Rodinal 1:112 for 15 minutes at 19c. |
 |
| Shanghai GP3 developed in Xtol 1:2 + Rodinal 1:112 for 14 minutes at 19c. |
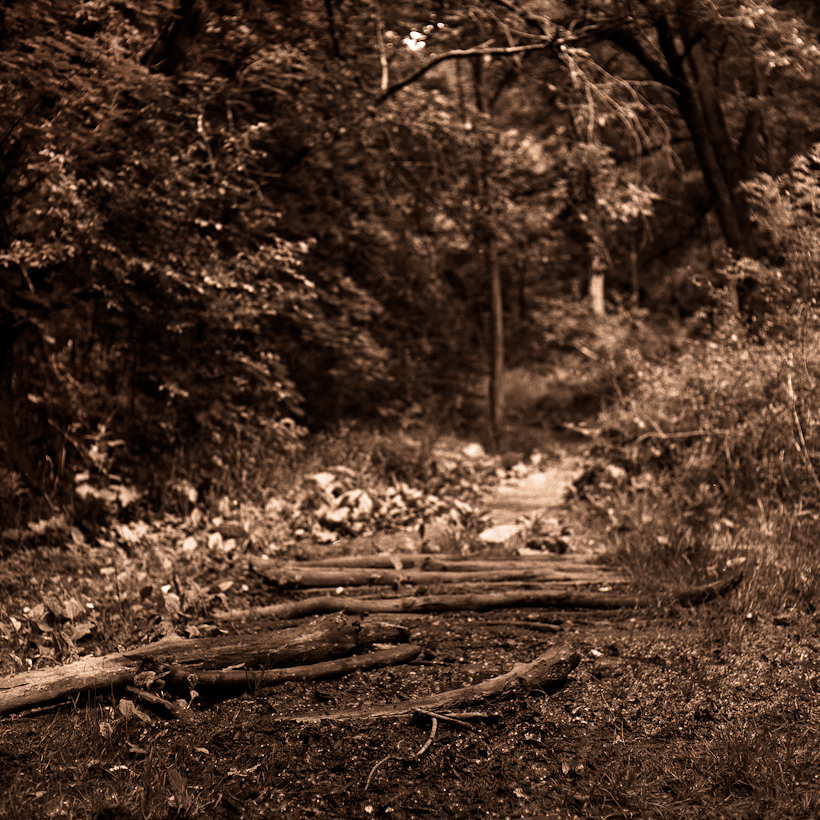
 |
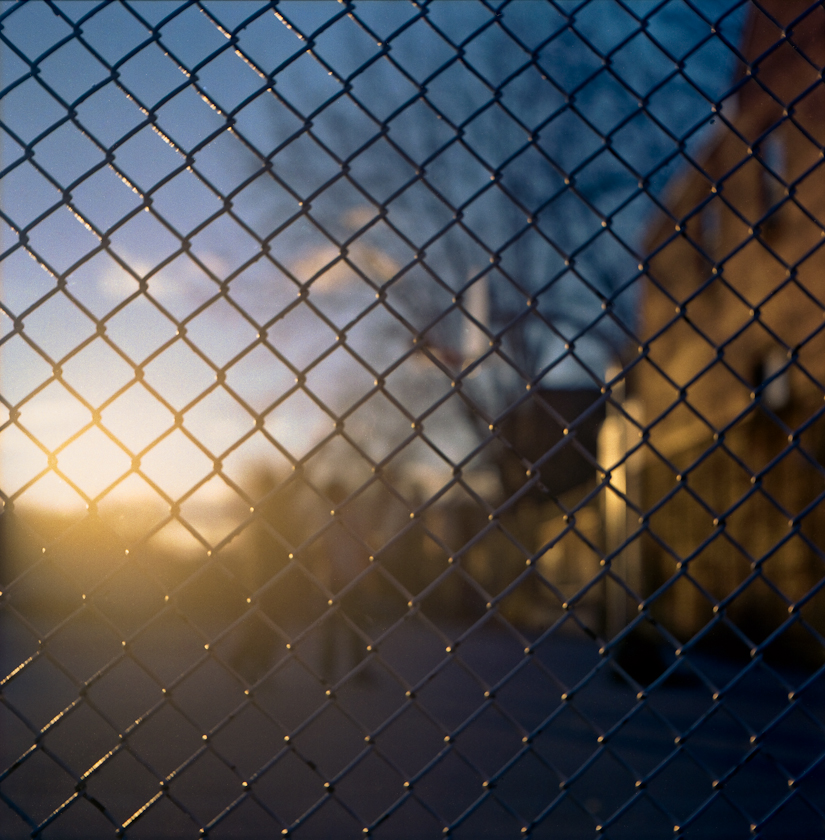
| Shanghai GP3 developed in Xtol 1:2 + Rodinal 1:112 for 14 minutes at 19c. Hard to see at this resolution but good sharp details with the snow grains and just a touch of blotchyness in the deep shadows. Looking pretty good but I need to get a better baseline before I can make any conclusions. |
 |
| Shanghai GP3 in Xtol 1:2 + Rodinal 1:100 for 10 minutes 27c, pushed +1 shot at ISO 160 |
 |
|
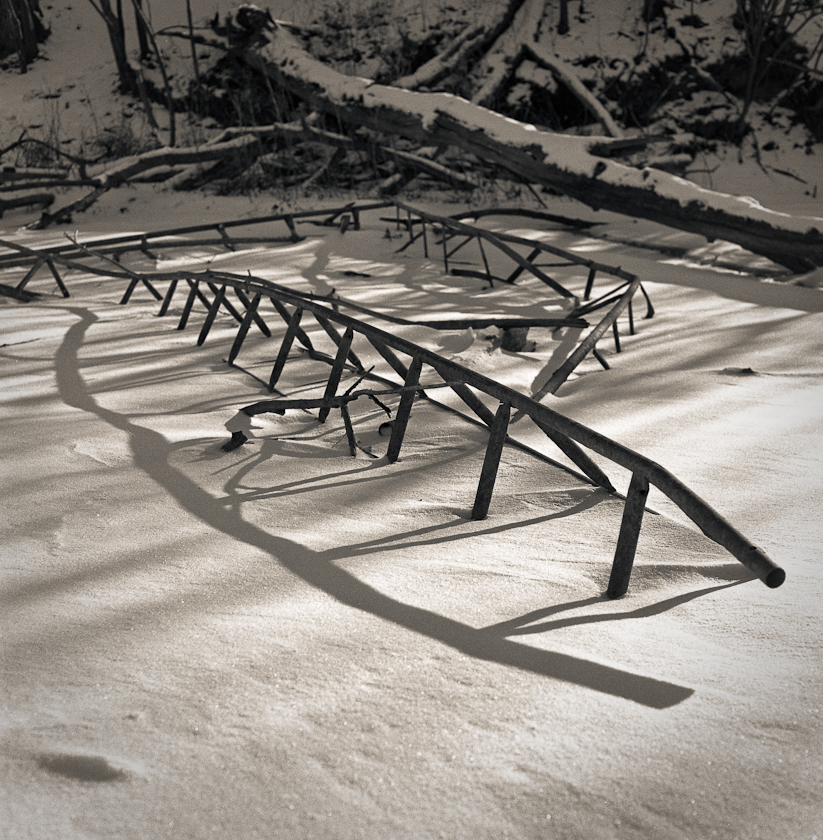
Tri-X 320p “Xtol 1:2 + Rodinal 1:112 for 12.2 minutes 20c
Tri-X 320P shows good dynamic range and retention of highlight
details in this high contrast snow scene with only a slight blocking of deep shadows. |
 |
| Fomapan Action 400 in Xtol 1:2 + Rodinal 1:100 for 9 minutes 19c |
 |
| Fomapan 100 in Xtol 1:2 + Rodinal 1:112 for 9 minutes 20c |
 |
| Tri-X 400 at 500 souped in xtol 1:1.7 plus rodinal 1:100 for 9.5 minutes at 23c |
 |
||
| Ilford Delta 3200 at ISO 3200 souped in xtol 1:2 plus rodinal 1:100 for 11 minutes at 25c (Pretty smooth for ISO 3200) |
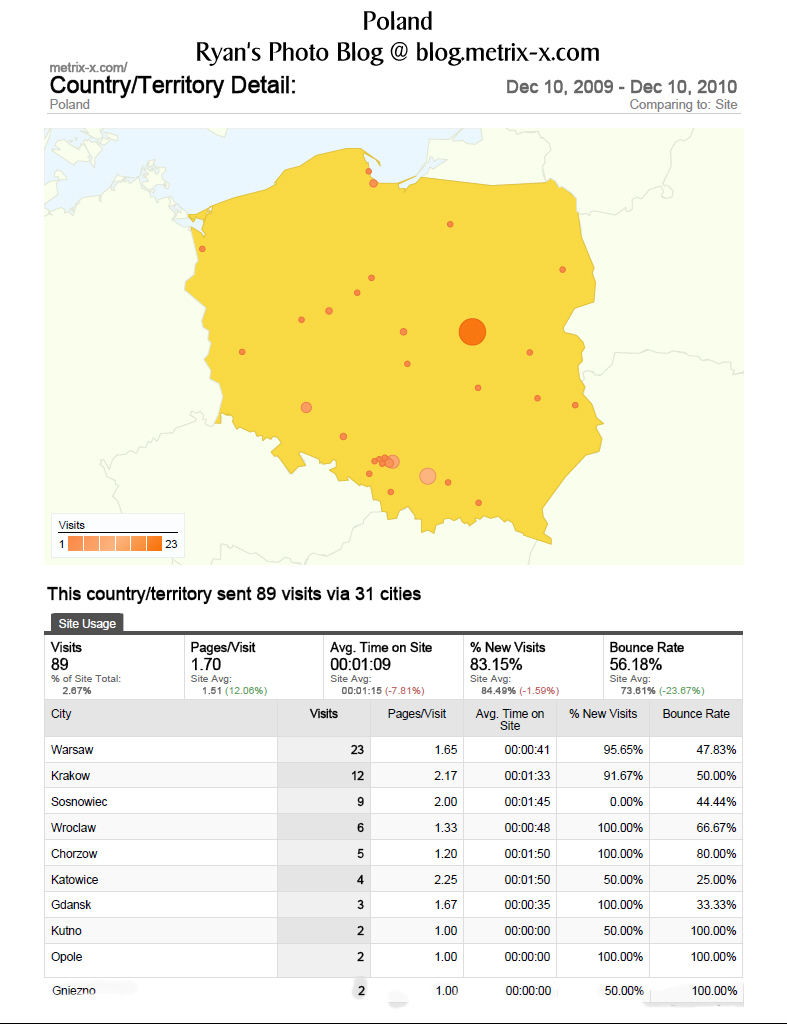
Google Analytics 8 Months On The Path To World Domination
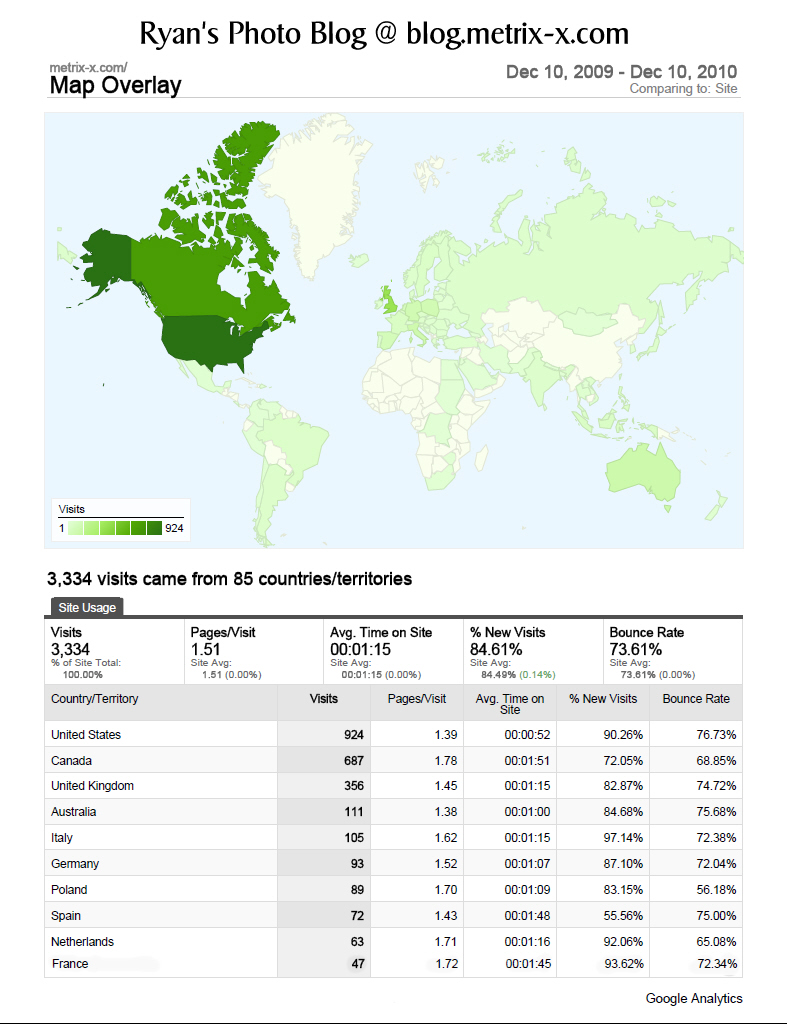
My Photo Blog at blog.metrix-x.com has been hosted by Google for 8 months now so the data is 4 months shy of a year. The interactive maps are one of the more interesting aspects of using Google analytics to track visitors. From the world map you can click down to the country and then down to the specific town.
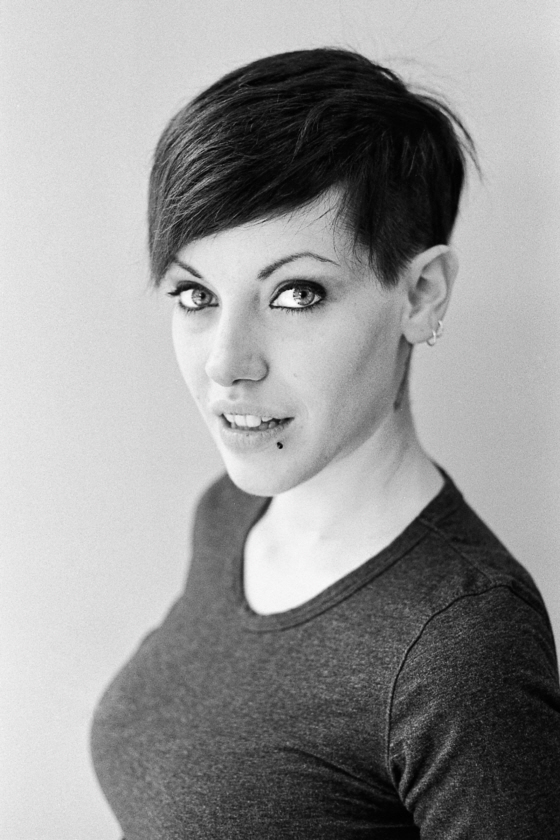
The New Kodak Portra 400 – Wasn’t What I Was Expecting – A Short Review
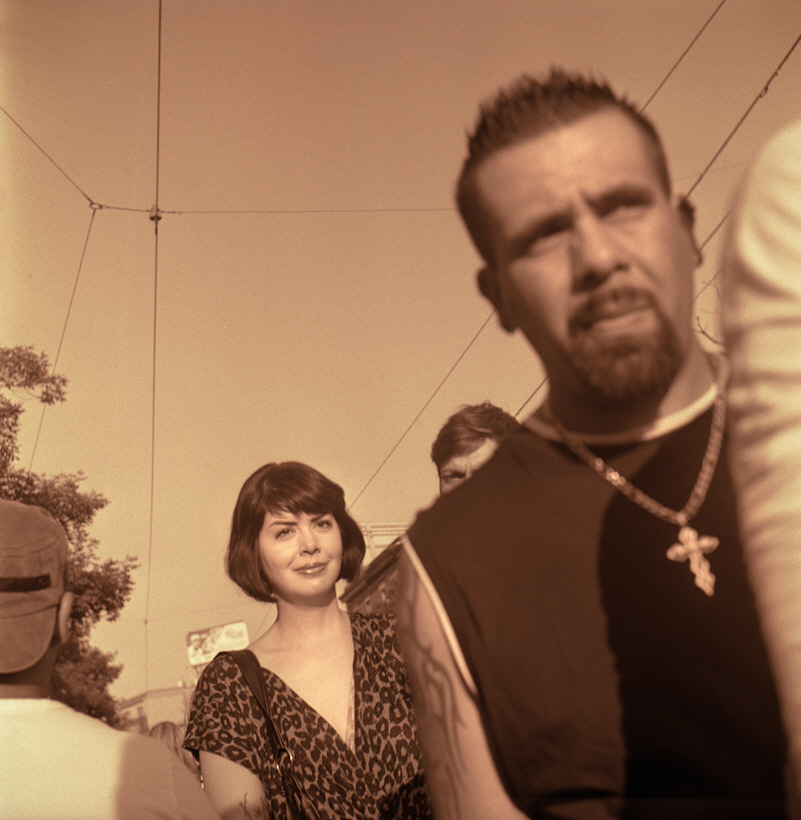
 |
| From My First Roll Of The New Kodak Portra 400 Shoot With My Mamiya C220 |
It’s not often these days of digital that a new colour film is released by a major manufacturer.
Last month Kodak released a new Portra film to replace both the Portra 400 NC and Portra 400 VC with just straight Portra 400.
What was I expecting? Maybe a ISO 400 film with the best characteristics of Portra 160 VC and NC with maybe some of the pizazz of the new Kodak Ektar 100.
What I got was a perfectly tame film. Good skin tones better then the old VC version of the film with slightly more saturated colours then the old NC version.
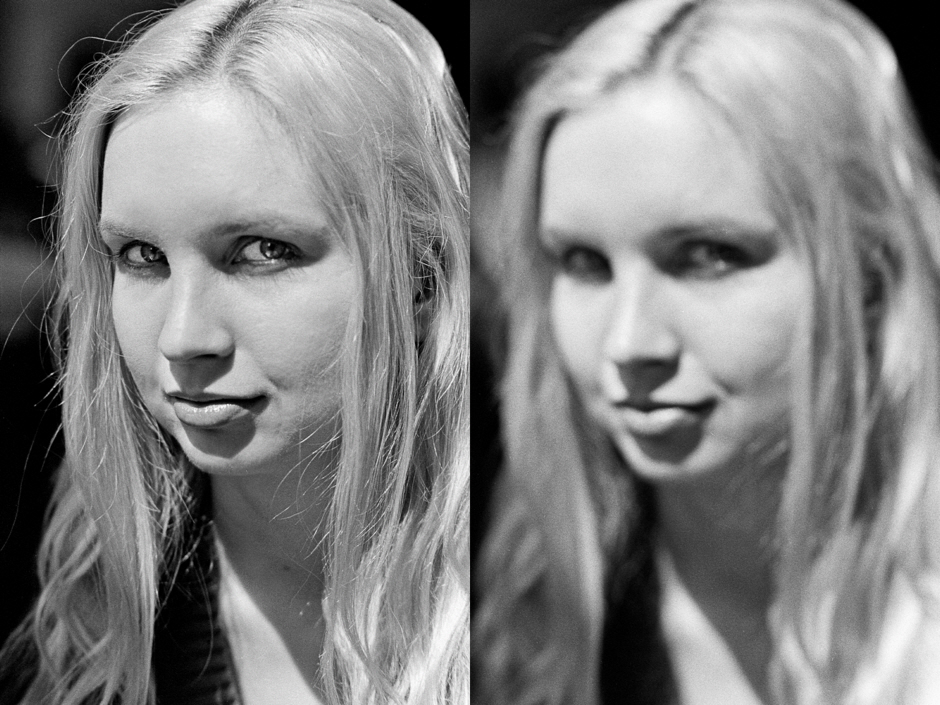
Scanning is extremely easy, usually I have to play around with the scanner black and white points for each colour to extract the whole dynamic range of a negative. Not so with this Portra even under difficult sun back-lighting it’s one touch scanning. The problem with the scans is that they lack contrast basically dull with all the information packed nicely into a smooth histogram,unusable without further digital processing. Once processed the results are rather good.
Portra 400 is definitely not a replacement for Portra 400 vc or nc it is a entirely new film designed for the digital age. This film fits the needs of a professional photographer that needs a film that works consistently well with their digital workflow. It’s not for those that want to develop and go directly to print. Yet with a bit of post both the new Portra and Ektar can make large prints that blow the DSLR out of the water in both colour and resolution.
Pros : Accurate skin tones, Sharp, Medium Saturation, Easy to scan
Cons : Needs post processing to bring out contrast update
Best Uses : Difficult Lighting, Batch Workflow

Lomography 120 Film ISO 100 Is Shanghai GP3
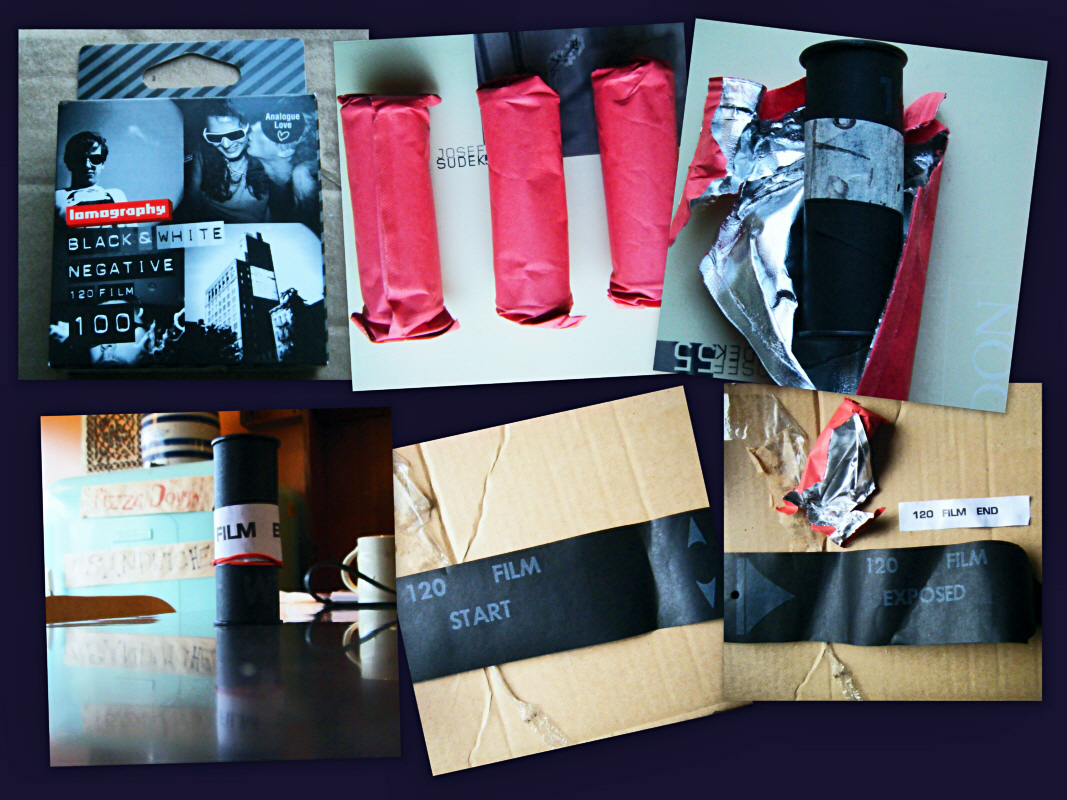
Last Saturday on a photo walk I found out that Toronto had an official Lomography store. Of course I had to check it out here’s a place that you can buy a $40 Russian camera from Ebay or $300 in the store. Interesting stuff but way over priced except for this 3 pack of 120 black and white film that was going for$10 taxes in. The store manager said it was repackaged Chinese Shanghai GP3. Surprisingly I had wanted to try some because I had heard some good things about the film.
Specifications:
Made in Shanghai, CHINA, for professional photography, practising photographing and developing.
- The film is made by coating a panchromatic photographic emulsion on a polyester or triacetate film base.
- It could be used both for professional and amateur photographers for all-purpose providing fine-grain at full tonal range.
- Unit item weight:30 g
Suggested Developing time:
20C degree:
D76 stock – 8 minutes
D76 1:1 – 14 minutes
D23 12 minutes
Rodinal 1:50 15 minutes
D72 1:4 4 minutes
Made by the SMPIC Photosensitive Materials Factory of Shanghai, an industry leader with more than 40 years of experience in making photographic materials.
Definitely Shanghai GP3 because of the edge code of “SGPFF” It had a slight strange plastic smell when I was loading on to the developing reel. I haven’t seen the punched hole near the end before. Also the sticky end of reel tape did not have any useful glue (make sure you carry an elastic band in your pocket), cheap backing paper with grey on black printing and a curl with enough springiness to act as leaf springs for a truck.
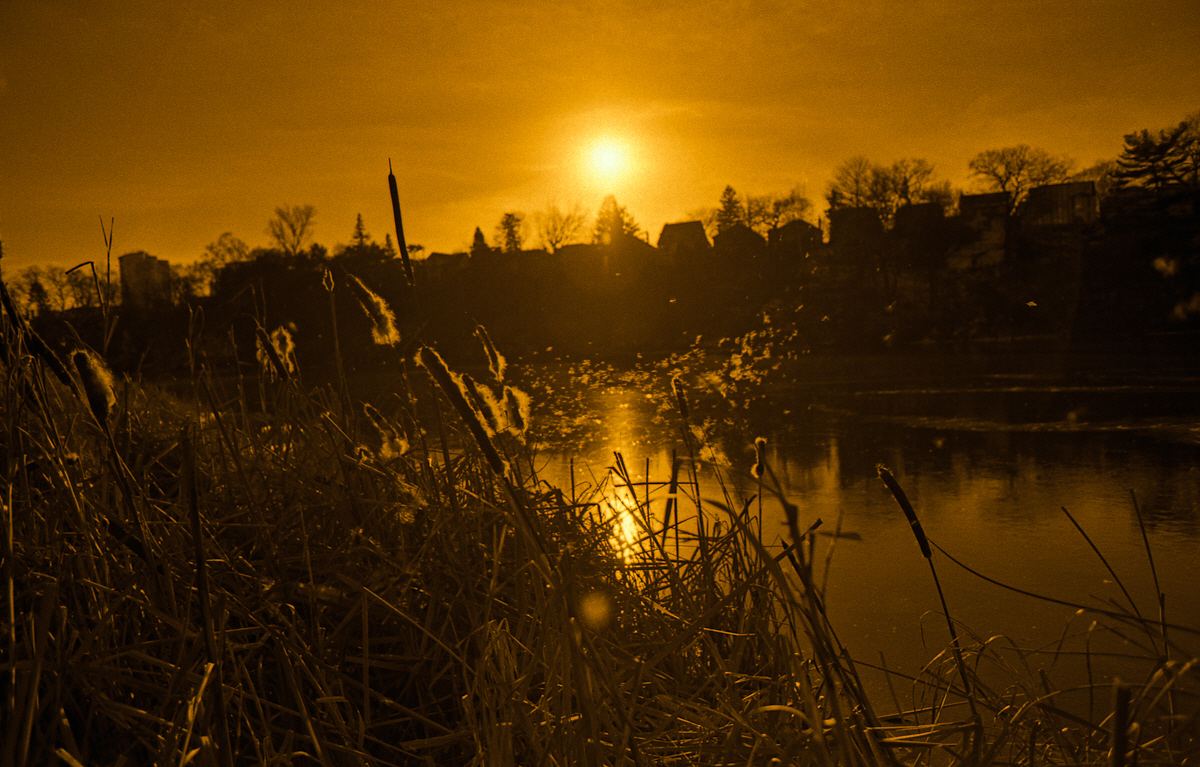
My first roll of Lomography/ Shanghai GP3 film.
This film is rated at Iso 100 and I shot the roll at 100 Developed 11 minutes in Agfa Refinal 19c this is a 2 stop push with no agitation after the first 20 seconds because the telephone rang and I forgot about the film. Except for one shot with blown highlights they turned out OK. I suspect the film should be rated at ISO 60, Nice tonality not that sharp. Light to medium blue dye in the pre-soak water. The film curls badly but doesn’t bow so it is still easy to scan. See previous photo for more details about the film.
My second roll I developed 8 minutes at 19c agitated every minute or so. The result was much better tonality also better sharpness for some reason.

Rare find in Toronto a Volvo C202, C303, Laplander or Valp
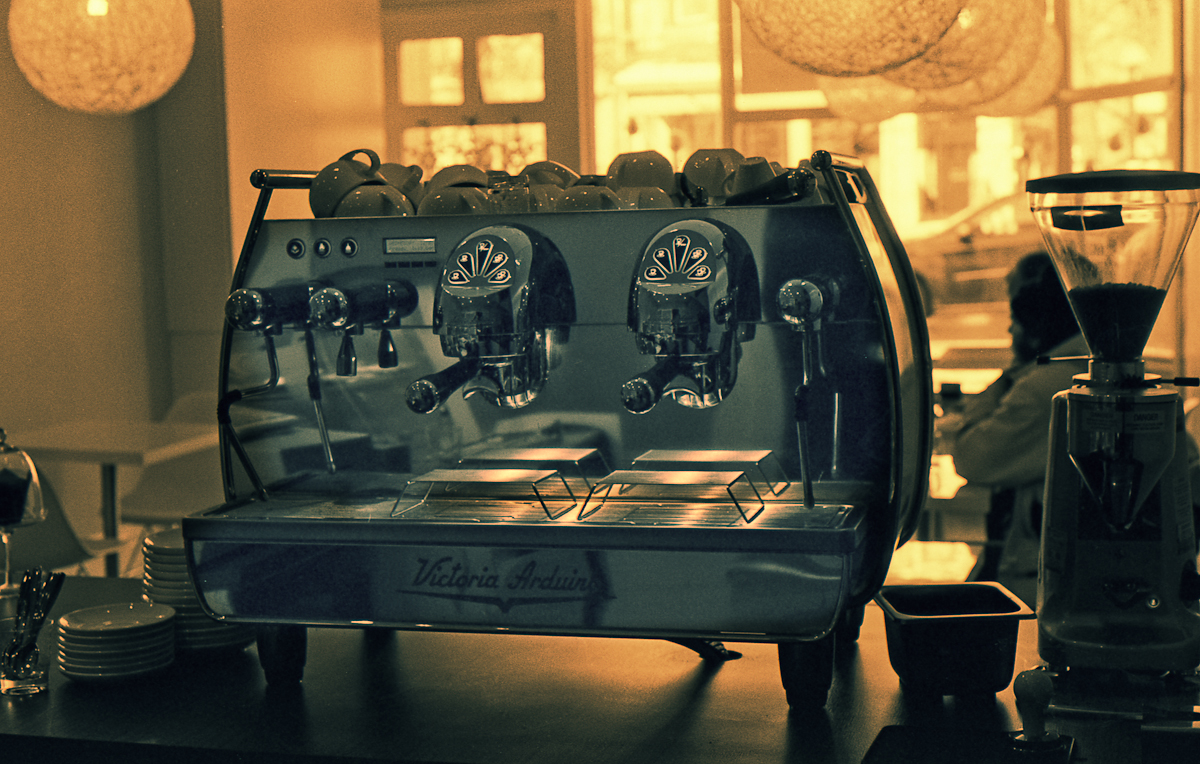
My favourite out of the second roll the tint comes from my scanning method to pull out more from the negative.
The third roll was developed with Xtol 1:2 plus Rodinal 1:112 for 14 minutes at 19c scanned using the same method as above.

Unlike Kentmere films it is a useful budget film to have in the bag for a slightly retro look.Flickr slideshow of my shots using Shanghai GP3
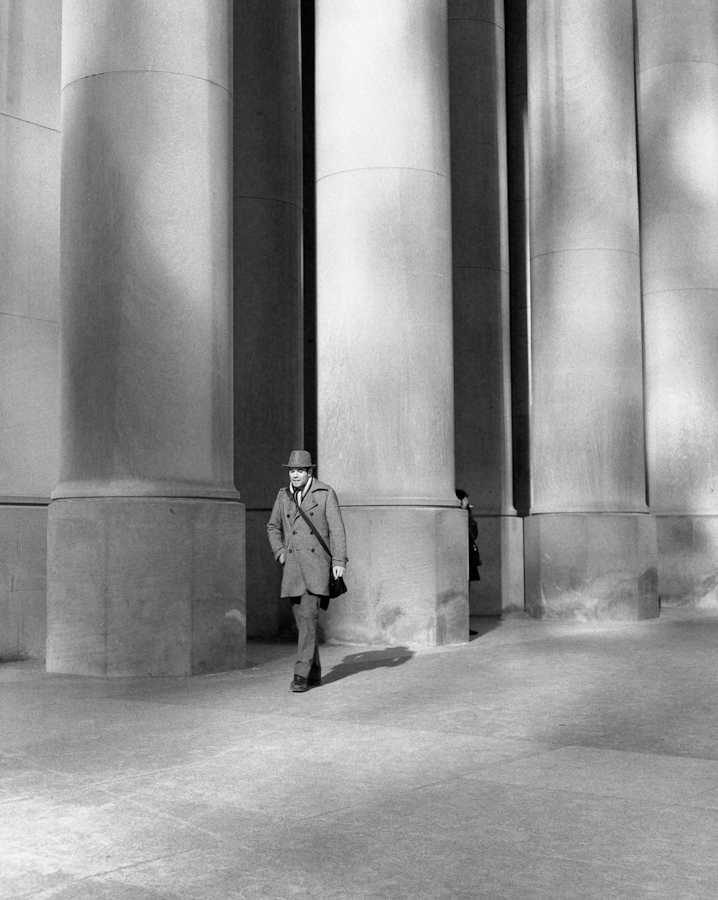
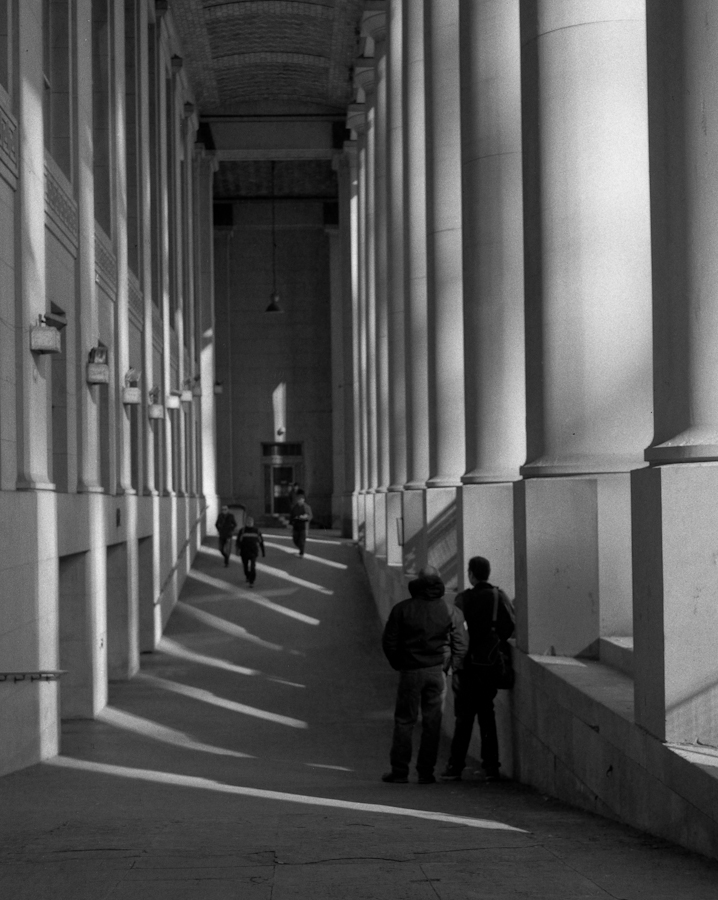
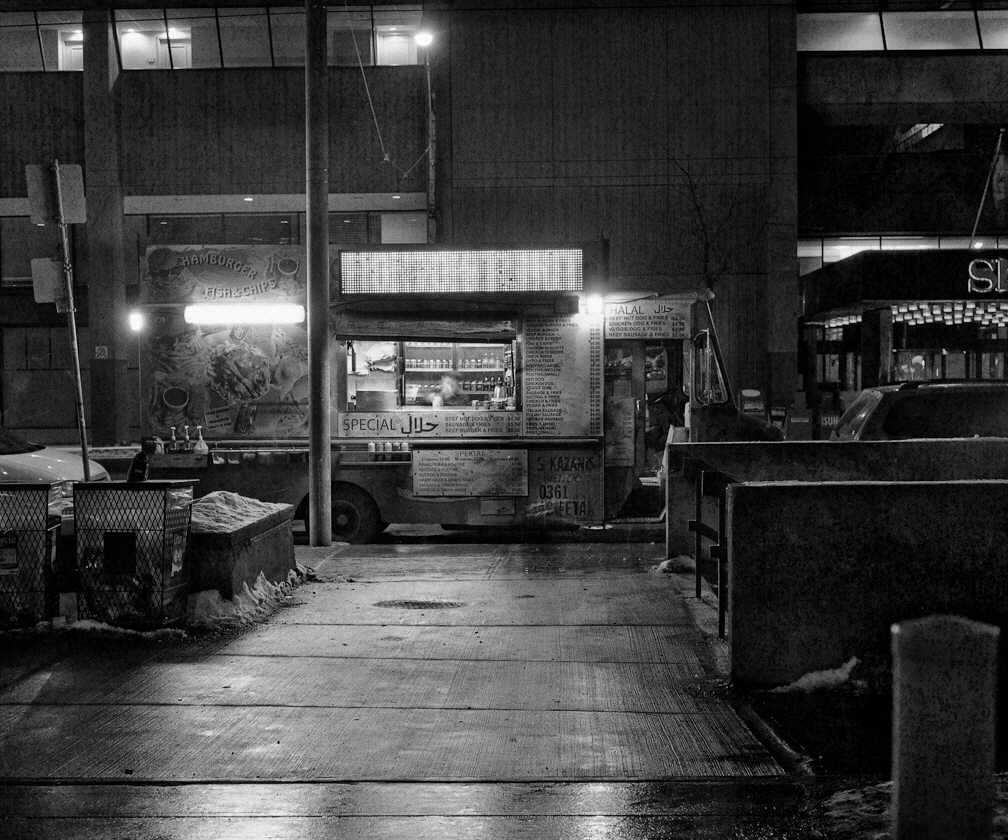
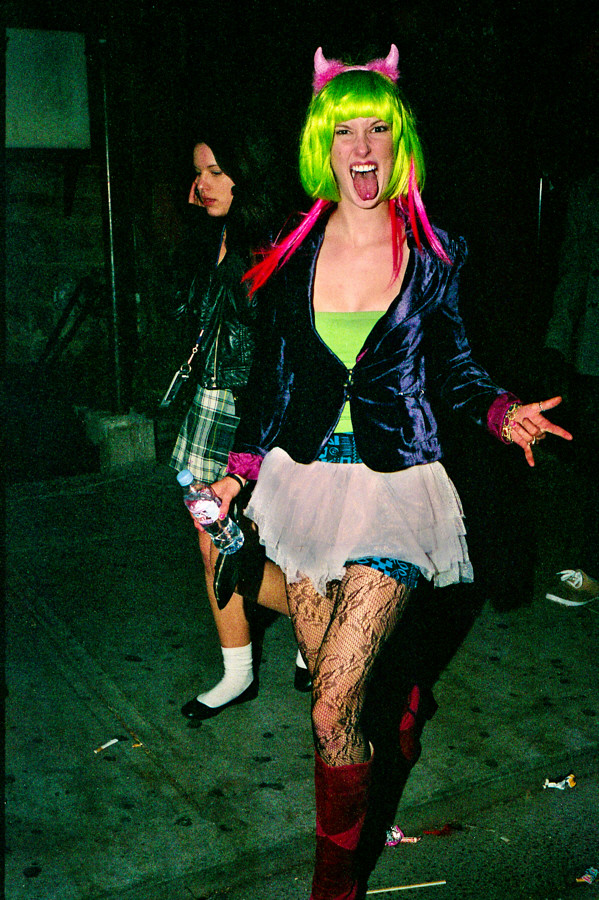
Using Olympus 35 sp Rangefinder For Night Street Shooting With Fash
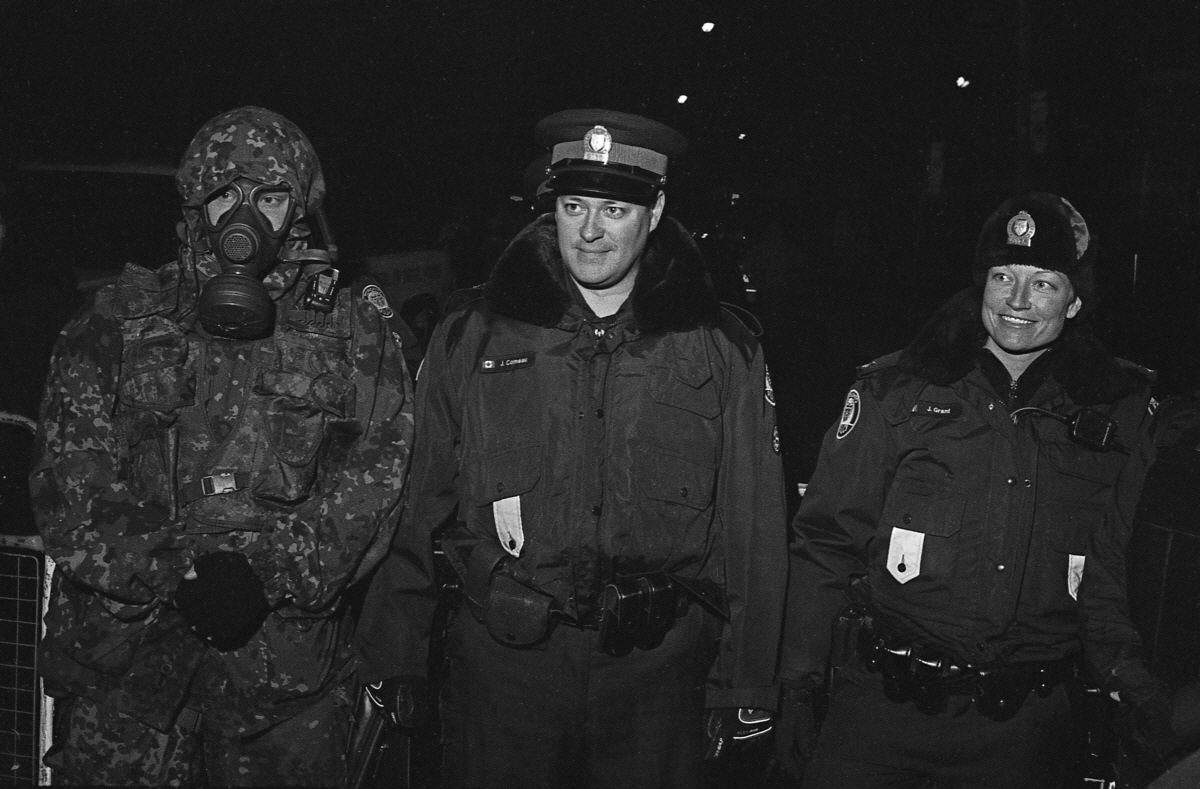
The Olympus 35 sp (produced 1969-1976) had some interesting advanced for the time feature. One of the features is flash control: By setting the flash guide number (GN) on the aperture ring-dial the rangefinder‘s aperture setting is slaved to the rangefinder focus distance. The farther away the the subject is the more the lens opens up to compensate for light fall off of the flash with distance. For this type of event this method has certain advantages over an auto flash which is often fooled by bright or dark surfaces.
Add to the camera a small flash with a coiled connecting cable and this allows for some interesting handheld off camera flash use. Most of you need no reminding the benefits of using off camera axis flash over on camera flash. So far I have only used this for night street use but maybe I will try some Bruce Gilden flash in the face style shooting.
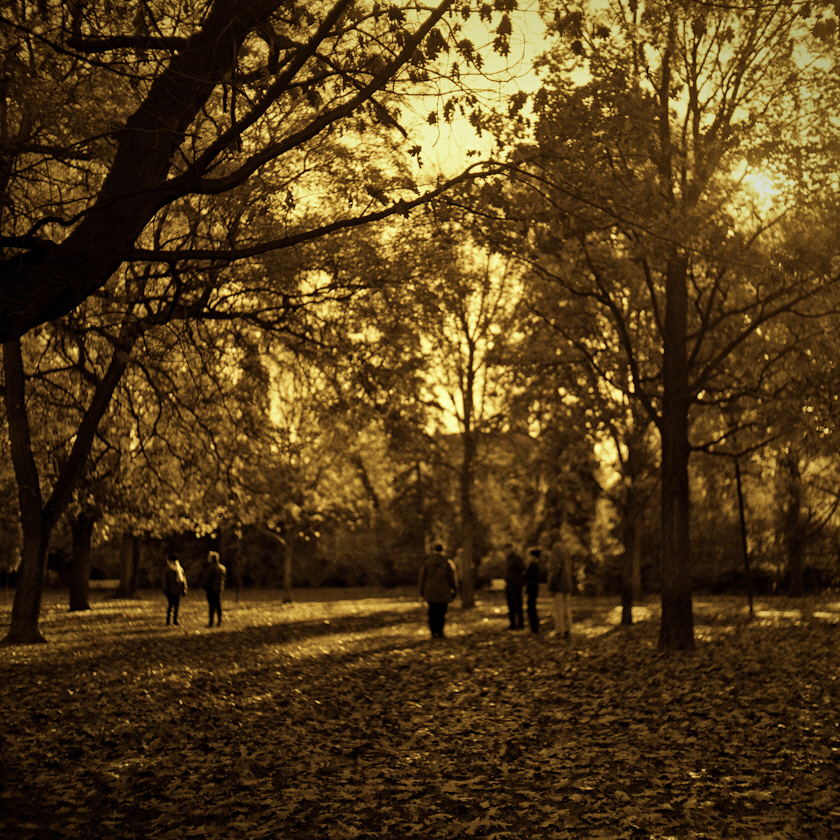
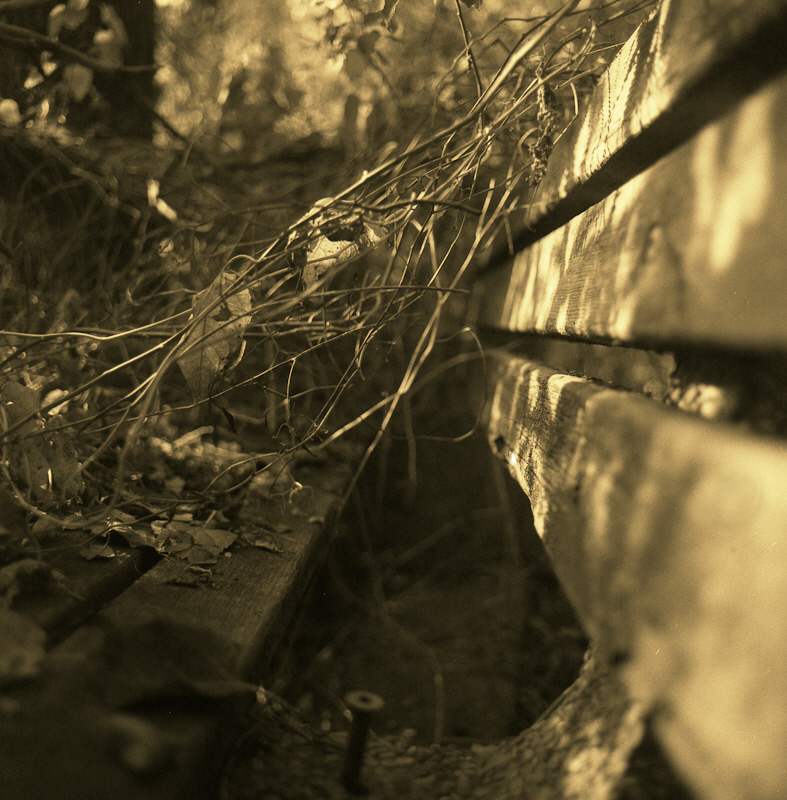
More of 2010 Halloween On Church St.
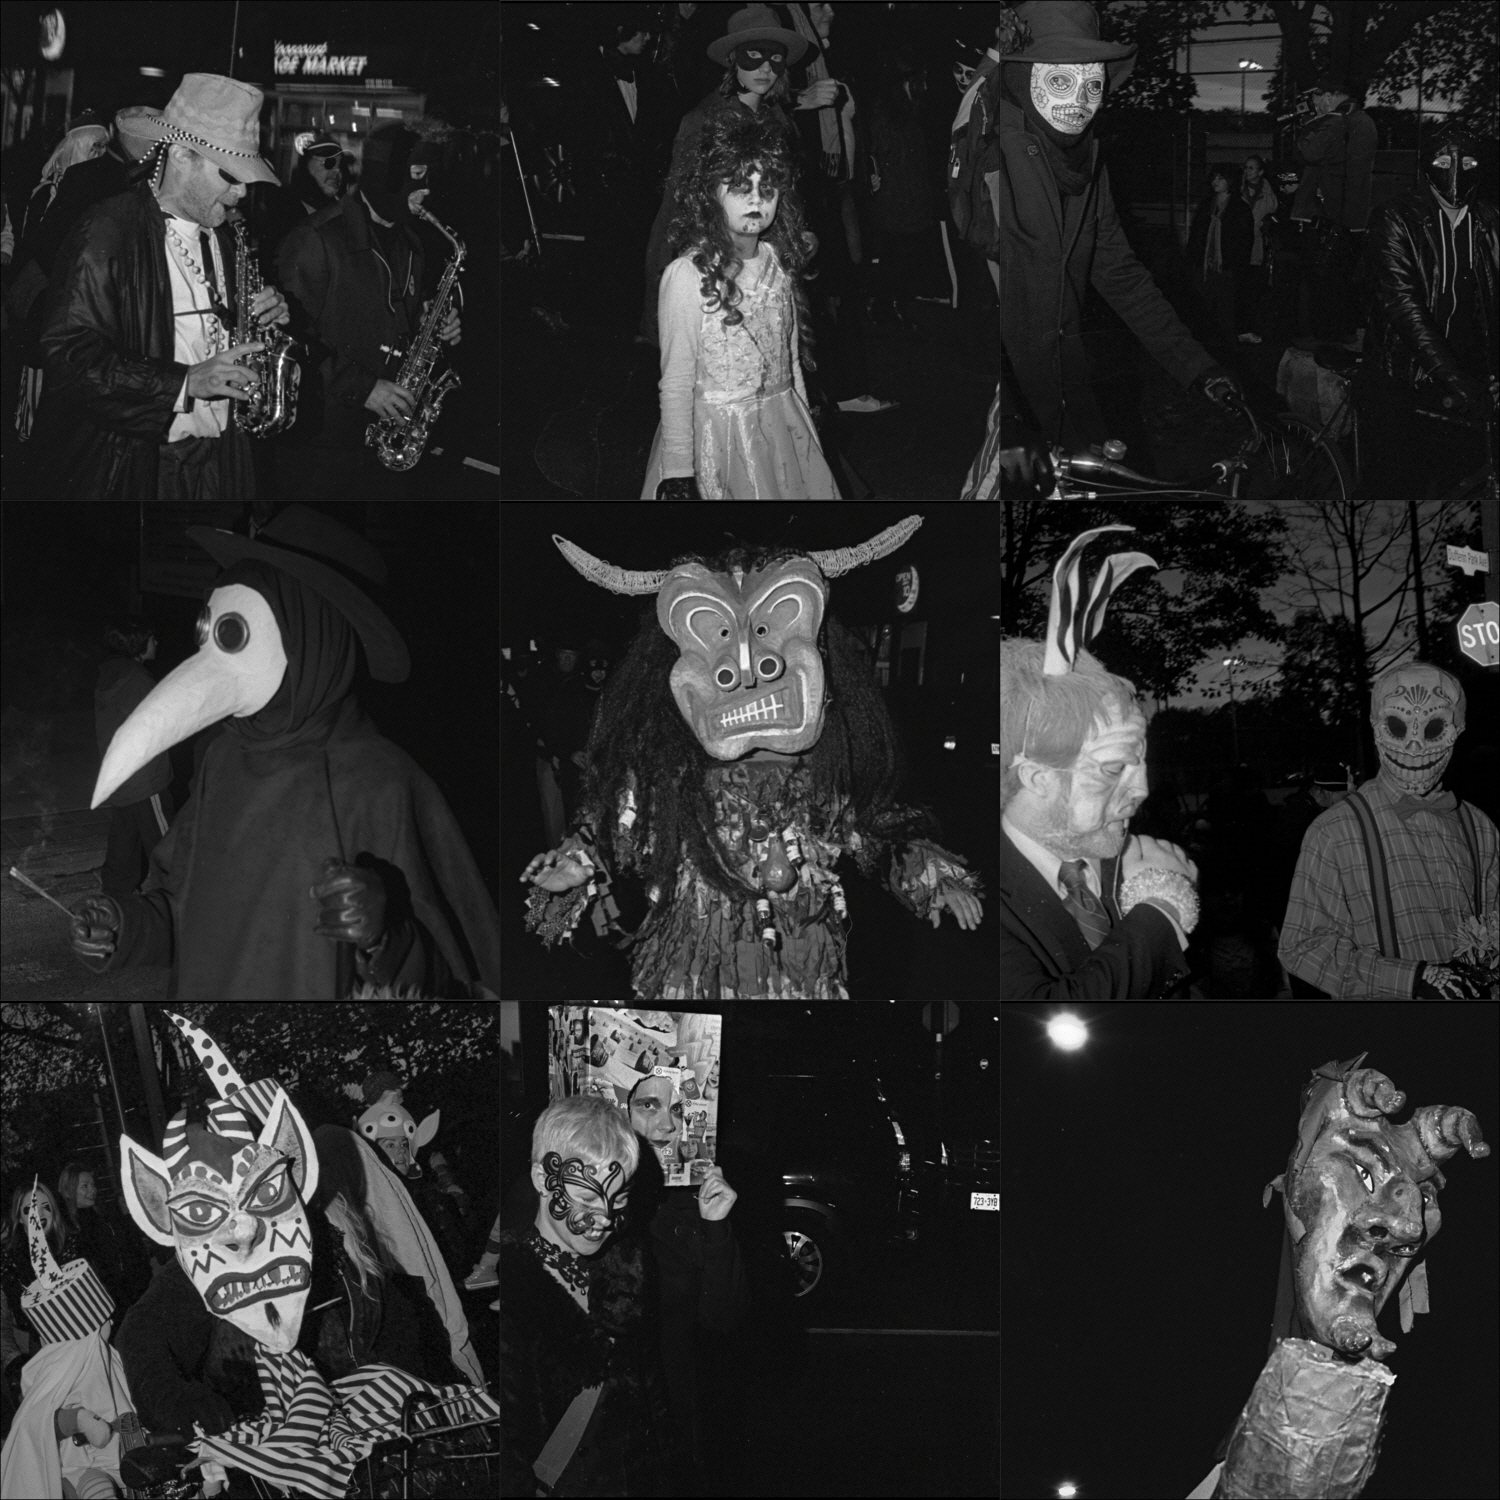
Contact sheet for the annual Dufferin Park The Night of the Dread. Here are the rest of the shots taken that night.
So ends the first stage of the experiment
Conclusions:
- Aperture slaved to flash guide number and the rangefinder’ focus distance works well for getting good exposures.
- Flash handheld off angle is better then on camera flash and you can still focus OK
- For close work a flash diffuser would really really help and also allow a lot more background to show up.
- For this use B&W is better then colour.
Well priced alternative to a flatbed scanner.7200 dpi scanner (when measured with a target it turns out to be 3800 dpi in both directions which is right in Nikon cool scan territory)
Actual Dmax > 3.6 and can be increased through multiple exposure mode.
The Negative:
Scanning is done through the included Silverfast Se plus software.
Manual feeder so after you load the carrier you have to push it through by hand one frame at a time. This is not really a problem as I hand correct every negative
No digital ICE (not really a problem for me as I don’t use it anyway and it doesn’t work on B&W)
My Findings:
If you have any form of workflow the Silverfast software is a piece of junk you would have to spend at least the cost of a scanner to upgrade to a usable version. Besides a rather useless raw mode it doesn’t have 48 bit per colour save function. The raw mode would be good if it integrated with lets say Lightroom but it doesn’t. It’s designed to work with another pricey piece of software you have to buy from them. I don’t know about you but I only like to scan once and use the file as a master.
To top it off they keep on telling you to read a 500 page manual and strongly implying that if you want to be a pro you are using the wrong scanner software.
The solution is easy buy reasonably priced Vuescan software. The pro has lifetime support, useful raw workflow and can support multiple scanner types.
Scanning B&W I used some nice grainy HP5+ and found out this:
Multi-exposure is effectively a two pass scan with each scan taken at a different exposure, the 2 passes are then blended together. This actually works and extends the dmax and dynamic range for difficult frames. There is a slight but noticeable lose of resolution. most of which can be recovered with some of the hated USM filtering. Not much need for this function with HP5 I will have to wait until I test it on some high dynamic range shot using TMAX film.
The raw scans pre-adjusted with a film profile seem to contain all the tone information with no banding or noise. Thus they can act as masters.
For 3600dpi scans there was marginally better detail and micro-contrast when scanning at 7200dpi at letting Vuescan reduce the output to 3600dpi (down sampling). This seems to be real not some USM shapening slight of hand (USM was off). Makes sense as the measured on a target dpi is 3800dpi and downsizing by 2 is equivalent to multiple sampling without the alignment problems.
As scan time is almost 4 times as long at 7200dpi I will use 3600dpi scans on images that I don’t care so much about and 7200dpi down sampled to 3600dpi on images that look interesting.
Also of slight interest was that letting the software convert from the colour scan to BW gave slightly better micro-contrast then converting the 48bit colour to 16 bit B&W after the fact or scanning in 16bit B&W.
I tested the same negative on my Epson V500. The Epson had less then half the actual resolution and more compression in the grey scale. The hp5 film grains were blobs instead of salt and pepper with the Plustek.