Art of Triptychs, Diptychs and Polytychs – Intuition Versus Intellect, Left Versus Right

A few years ago I started a small group on flickr called Art of Triptychs, Diptychs and Polytychs. The form fascinates me but I can’t help wondering how some of the contributers to the pool do such a superb artistic and aesthetic job of choosing their images.
I confess my own polytychs are not very artistic. I’m a pretty equal right brain/left brain type of guy. Unfortunately this doesn’t mean I’m balanced, quite the opposite at one moment of time I am either one or the other not both.
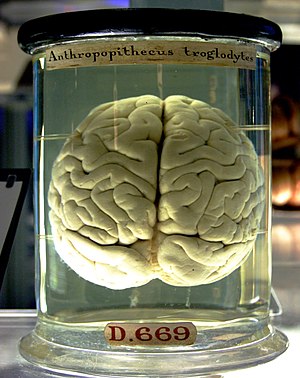 Image via Wikipedia Image via Wikipedia |

For me polytychs are particularly hard art form because as soon as I start to think about joining 2 or more images together the reasoning/logical side of my brain switches in blocking out any intuition and creativity.
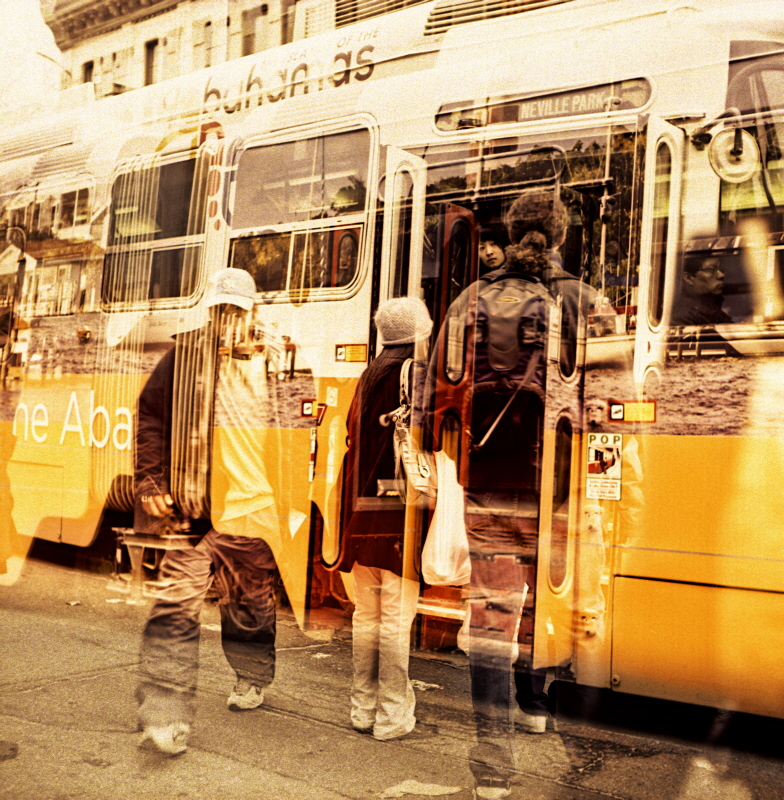
I don’t have this problem with in camera double exposures. I either plan the 2 shots before I take the first one or I take the first shot and hold it in my mind until I find something that fits with the first shot as the second exposure. In either case when I’m photographing my brain is usually in creative mode. I have been practising doing double exposures for several years now so even the planning is subconscious.
Converting A Colour to A Black And White Image Utilizing Selective Colour Contrast Filtering
Sometimes you might want to convert a colour image to B&W. You have used the usual techniques like contrast and brightness curves and maybe even the channel mixer, you have dodged and burned but it still seems to have lost some of the details of the original colour image. Thats pretty normal because some of the details in the original are because of changes in colour not changes in intensity.
Consider a portrait where a person has no fashion sense or maybe Scottish and is wearing a red and blue plaid shirt. If the blue is near the same intensity as the red the checker pattern will blend in when you convert to B&W. Well the quick answer is to use either the channel mixer or a selected colour filter when you do the conversion this would either selectivity darken the red or the blue. But wait although the plaid shirt looks OK the skin starts to look blotchy, not very flattering for a portrait..
The answer is rather simple you selectively blend 2 B&W versions of the image together. One version optimizes the plaid while the other optimizes the skin. If needed you could add more versions to optimism additional parts of the image.
 |
| Original Colour Image |
I am going to try to illustrate using a bad example, bad because the colour version from the MF film shot looks far better then the B&W. Note the bright red berries back-lite translucent in parts and the bright green yellow pallet of the background.
In this example I used the channel mixer to create 2 images plus a 3rd which is the luminance channel from the original colour image.
 |
| Left: Red Berries Centre: Green Background Right: luminance channel |
The best (at least for this example) of all 3 images were combined together to give the final image. The berries in the left image was selectively combined with the centre image and finally the low contrast upper right corner was taken from the luminance channel.
 |
| Final B&W with selective contrast filtering |
Fun With B&W Film – How To Do HDR From A Single Scan
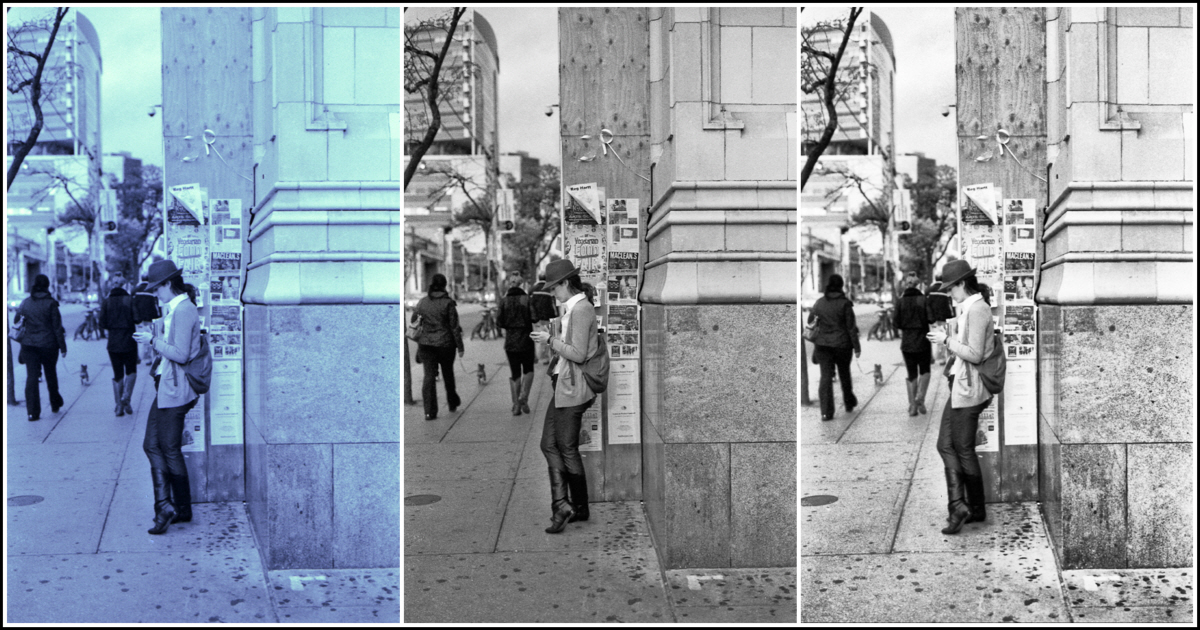
Right side is a special colour scan of a B&W negative, the middle is a normal scan plus some dodging and burning. The right-side is a HDR image obtained with the 48bit colour left-side image. The right side is scanned in 48 bit colours where the individual RGB channels are adjusted for gain, offset and gamma via the histograms utilizing the epson software prior to scanning in this case the green channel is normal exposure the red is -1.5 stops under exposed and the blue is +1.5 over exposed. After the scan the RGB channels can be manipulated as a colour image or separated into 3 monochrome channels. You can then process as a colour image or alternatively as an HDR or with tone mapping software. Or as I mostly do you could keep it as a toned image or convert it back to B&W.
This being 30 years old Kodak Plus-X it does not have nearly the dynamic range of that of most fresh films such as tmax would have.
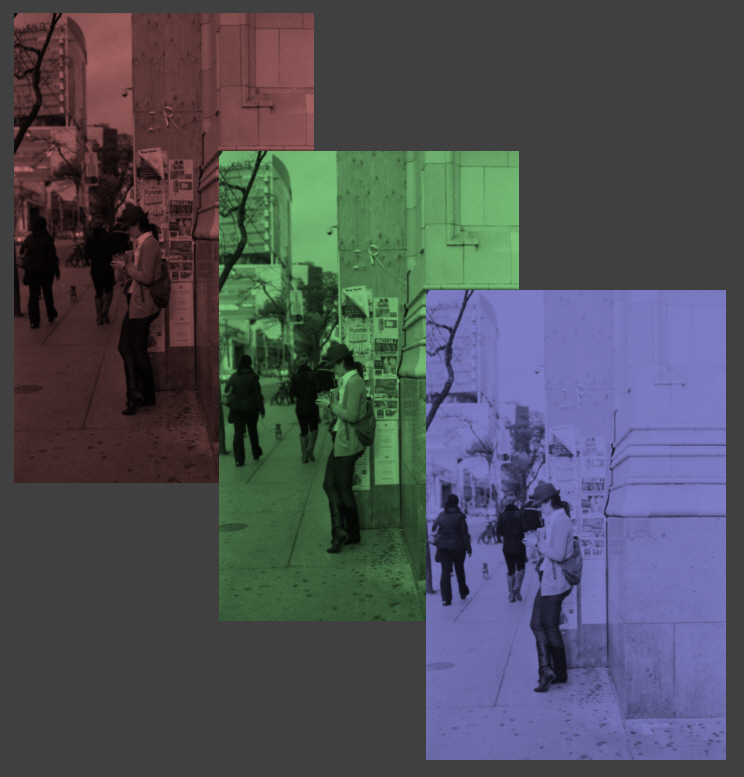
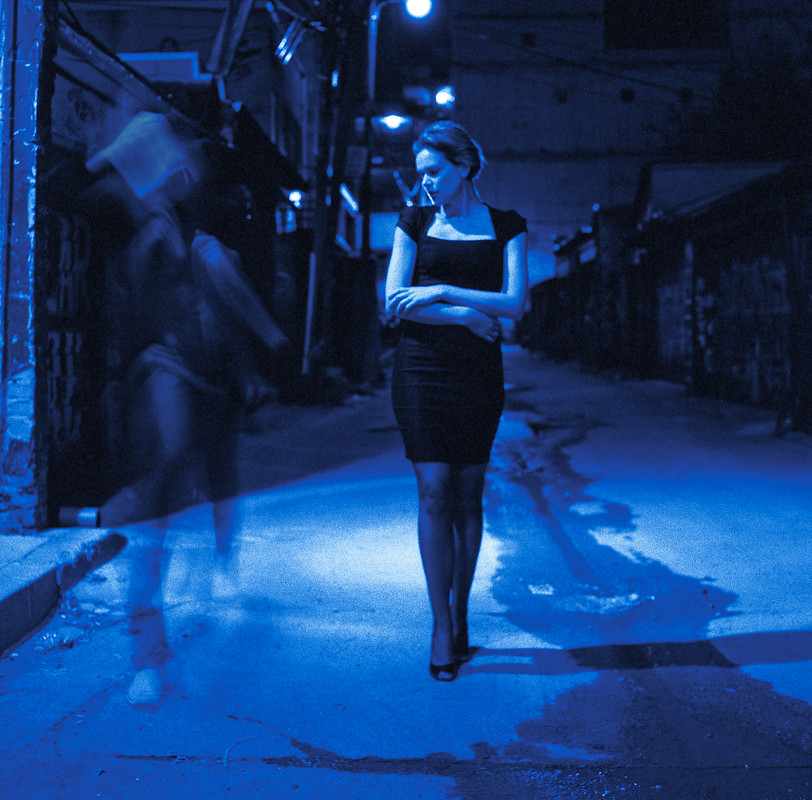
 |
| Casa Loma Stables – The gold tones are because of the scan RGB gains of (1.5,0,-1.5) The reverse of the blue tint above. |
Fun With B&W Film – How To Get Duotone Straight From The Scanner

Left side is scanned in 16 bit B&W mode. Then duotone tinted in Lightroom. The right side is scanned in 48 or 24 bit colours where the individual RGB channels are adjusted for gain, offset and gamma via the histograms utilizing the primitive epson software prior to scanning in this case to give the red tint. The above film is 30 years old Kodak Plus-X!
Note: French lavender pictured above is now grown in some peach orchards because they repel a moth that is a pest to the peaches.English Lavender has a far weaker scent and does not have any of the same insect repelling properties.
Who Says Sunny 16 Can’t Lie
The title is a spoof on this 1959 Popular Science article Who Says a Light Meter Can’t Lie I doubt if this was the first article on the subject it certainly isn’t the last. Personally I use a good light meter mostly in incident mode. If it lies it’s because of operator error usually because I didn’t make up my mind before I took the shot on what the subject should be.
One of the proposed solutions is not to use a light meter. If you shoot film you have most likely heard of Sunny 16 Fred Parker’s The Ultimate Exposure Computer is the best reference I can find on the application. Sunny 16 seems to be a good method in normal outdoor nature type photography that is if you have some experience with the light in the location. Normally scattered light makes up only 10% of the incident light but this can change because of reflected surfaces and atmospheric conditions. How hazy, diffused or how soft can be a difficult measurement to make with only the human eye. As it was not a survival requirement us humans are not good at making absolute light intensity measurements, you need experience and references to adequately judge light in many conditions.
Most of my shooting is done in a city environment where tall building often shade out the sun, where scattering and reflections make up a higher proportion of the light then in the open air. Even here a friend of mine has learned to judge the light mostly correctly but sometimes a couple of stops off. He uses years of experience not sunny 16. In the golden hour shooting into the sun and away from the sun is one of the best times to get dramatic city scenes. But sometimes he is fooled and is several stops wrong.
When the sun is at 10 degrees to the horizon on a early fall afternoon in Toronto because of the extra amount of atmosphere or air mass (AM) it has to pass through there is about 1 stop less light then at noon. The science is well developed and you can go here to see the math and use their calculator. The factor depends mainly on global position, time and date.
Shooting into the sun you have to contend with a super bright background (the sun and sky) and reflections of surfaces like pavement, choices like highlight or silhouette. How much reflected light is getting back on the subject and so on. Shooting away from the sun both the reflected light and the angle of the subject to the sunlight can make up to 4 stops of difference. The amount of light falling on the subject varies around 3 stops depending on the angle of the sun to the subject. At 10 degrees to the horizon there is about 2 stops lower illumination between the horizontal surface for example a road and a vertical standing structure such as a person. Once again this interactive graphically illustrated calculator comes to the rescue to save the reader from having to view my hen scratching.
Tip: I learned to use a incident/reflective light meter by carrying the meter around with my digital camera. After about a month I could set my digital camera using the meter and get better exposure first time then using the digital: shoot, chimp the histogram and repeat method. At that point I knew I could rely on on the meter for all my film camera. Even with digital I still prefer the light meter in studio and critical lighting conditions.
Don’t forget that film is usually more sensitive to under exposurer while clipping because of overexposure is the bane of digital cameras.
Making a Pinhole lens for a Canon DSLR
Originally From My website July 2005
Specifications:
Depth of Field – Infinite
Equivalent focal length – 50mm
Resolution – very poor!
Speed – slower then you can imagine.
Cost – cheapest Canon lens (the main component is a Canon part)
Making the Pinhole Lens
Parts:
1. Canon camera body cap. Canon caps because they have a thread are claimed to be light tight. I brought an used cap, so technically this is a used Canon lens. Test out the light tightness of the cap by placing it on the camera body and exposing a shot directly into the sun for 5 seconds or so. The exposure should be completely dark. This test is good for other models and makes of cameras.
2. Quality aluminum foil
3. Plastic film with self adhesive backing. I used the clear 3m film that they apply to the front of automobiles to prevent rocks from chipping the paint.
4. Hollow tip 32 gage needle. I used a new insulin pen needle.
5. Sharp craft knife or razor blade
6. Cutting board as a work surface
7. Small piece of dense stiff foam such as styrofoam
8. Cork
9. 3/16″ drill
Construction:
1. Drill a 3/16″ hole in the inside center of the cap. Use a piece of wood as a backing so that the hole will be fairly round. Use the knife to clean and deburr the edge of the hole.
2. Cut a donut shaped piece of plastic film 3/4″ OD. – 3/16″ ID.
3. Cut a 1/2″ disc out of the aluminum foil.
4. Flatten the foil by placing on a hard flat surface and rubbing the foil with a piece of cork (drink the wine first). Be careful not to damage the foil.
5. Place the 1/2″ foil disc on the backside of the cap, centered over the 3/16″ hole.
6. Remove the backing to expose the adhesive on the plastic film donut.
7. Place the film donut sticky-side down centered over the foil, use your fingers or the knife edge to seal the foil between the film and the cap. Make sure the foil is flat and sealed around the complete circumference. Note there should be only foil covering the center of the cap.
8. Place a the cap face up with the bottom of the cap and the foil supported by a small piece of dense stiff foam.
9. Very carefully puncture the center of the foil with the 32 gage needle. The motion of the needle should be straight up and down., any sideways motion or too deep of a penetration will distort the pinhole.
10. Have fun!
Alternative Way to Make the Pinhole
Before the foil is installed in the cap just after step 4:
- Once again the foil must be supported by some dense stiff foam such as Styrofoa
- Make the pinhole as in step 9
- Repeat step 4 the foil flattening step
- Inspect the hole to make sure the edges have not been pushed back into hole by the flattening of the foil
- Install the foil as before
Using this method allows you to practice making pinholes and also allows you to inspect the hole before installation. Note that the needle can only be used a few times before it will get dull and has to be replaced.
Each different pinhole will have its own unique qualities, ideally the pinhole should be perfectly round, perfectly flat and as thin as possible. This is impossible without buying a manufactured hole (yes you can buy a hole) . Unfortunately my microscope is on loan so I can not actually inspect the pinhole except by holding it up to a light bulb. Hopefully I will update the page with actual hole details when I get the microscope back. Alternatively a flatbed film scanner could be used to scan the hole.
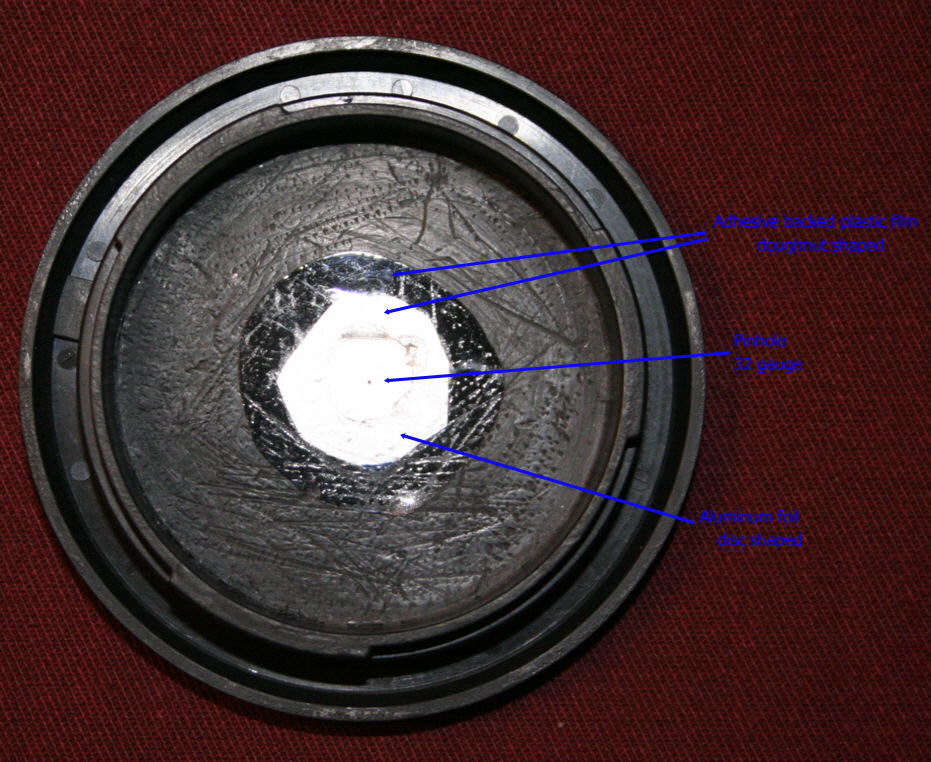
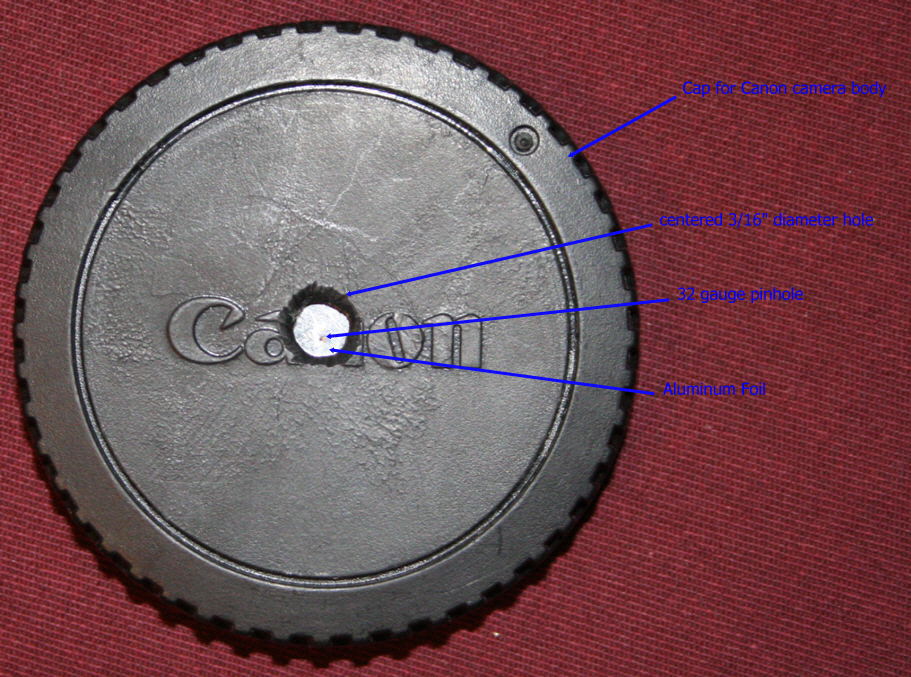
Notes:
- I originally used plastic tape instead of the film. But it took a couple of trys to get a good (nearly centred) pinhole, I found it was very difficult to remove the gummy residue from the tape backing, I tried soap and water but that did not work. I tried a cleaning fluid but as you can see in the pictures it attacked the plastic cap and messed up the finish. The plastic film has an adhesive that stays with the film even after you remove the film from the cap, this makes replacing the pinhole an easy job.
- Dimensions except for the pinhole are approximate.
- Many of the pictures have some contrast lose, some even have a rainbow effect. This could be caused by light leakage, a ragged irregular pinhole edge or most likely from the large amount of light that comes through pinhole outside the FOV (field of view) of camera sensor. This light is reflected and diffused onto the sensor. If I shield the lens from off angle light the effect goes away see below for a partial solution..
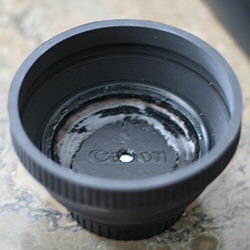
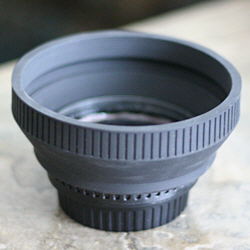
- The low resolution of the lens is mostly related to physics. The pinhole is around 0.3 – 0.4mm diameter and a pixel on the camera sensor is many times smaller. The only way to get higher resolution would be to have the camera sensor area much larger, lets say as large as a large format camera. No way on a proconsumer camera! There is also both a diffraction limit and equivalent For a lens hood I brought an inexpensive rubber hood and glued it on with Gloop. The hood allows about a 90° field of view which is still too wide for the pinhole lens.F stop light limitation on the minimum pinhole size.
Some References:
This Page On My Original Website – contains some more details and pinhole image processing tips
My Blog posting homemade 8×10″ large format pinhole cameraThe Pinhole Gallery – A Gallery of Contemporary Pinhole Photography
The Pinhole Camera – Imaging without Lenses or Mirrors By Matt Young (Some of the physics and history of the pinhole camera)
Luminous Landscape – Pinhole Camera Tutorial This page has some good photos and suggestions for making large format film cameras
Isabelle Lousberg If her work doesn’t inspire you why bother!
F295.org – Exploring 21st Century Photography
youdesignit.com – pinhole-photography
Online Schools: Guide to Pinhole Photography
PINHOLE PHOTOGRAPHY AND CAMERA DESIGN CALCULATORS
August 21 2005 Pinhole Pictures with Lens Hood
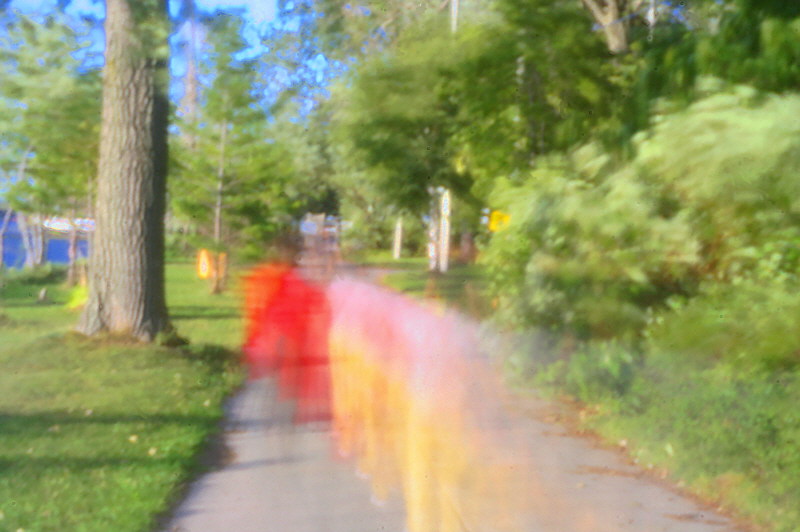
Two Bicyclists
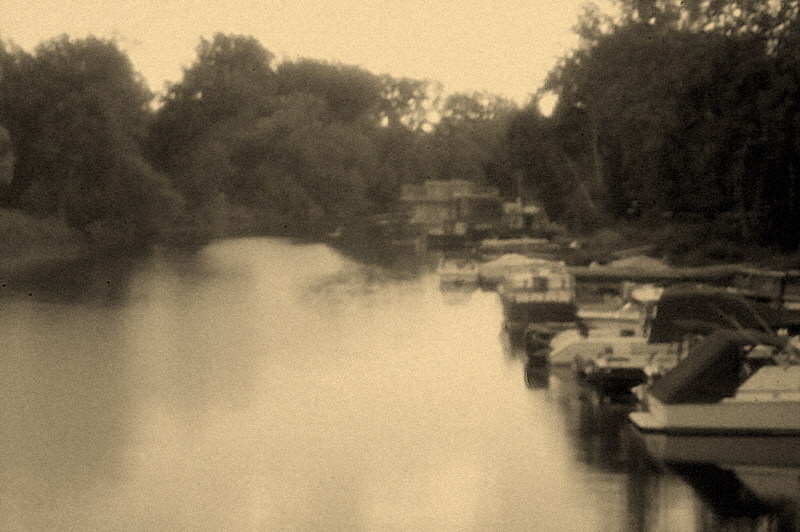
Wards Island Gap
Please contact me for permission to use or reproduce any part of this page photos@rraz.ca
Ryan
Really Bad Video Productions

RBVP is my tongue in cheek name for my low tech attempt to fool around with moving pictures. As long as I don’t take myself too serious the making of small video clips has helped me widen my horizons.
The following Youtube video I made with about 100 shots out of my DSLR. The idea is to make a sculpture out of real life.
My first attempt at this type of stop motion was done a coupe of weeks ago using much fewer photos from my P&S:
My P&S actually has real video, too bad the compression algorithm is so lossy or else I think it might actually be a good video camera. But it is still good enough to record RBVP documentaries or music video style videos.
I doubt it but if you would like to see more but RBVP on YouTube or on Flickr
Colour Balance Epson Scanners – A Short Note:
Often when scanning it’s not only the white balance that needs attention. In this case the white balance is fine but the mid greys and darker have a blue cold colour ting. The leaves are also meant to have more browns.
Epson software is pretty bad when it comes to colour balance. It does more of a white balance then an actual colour balance. Using an image in this thread as an example I added a mid black correction of the image. This type of colour balance is important for films like the new Kodak Ektar.
Here I have used the pavement to re-balance the colour balance.
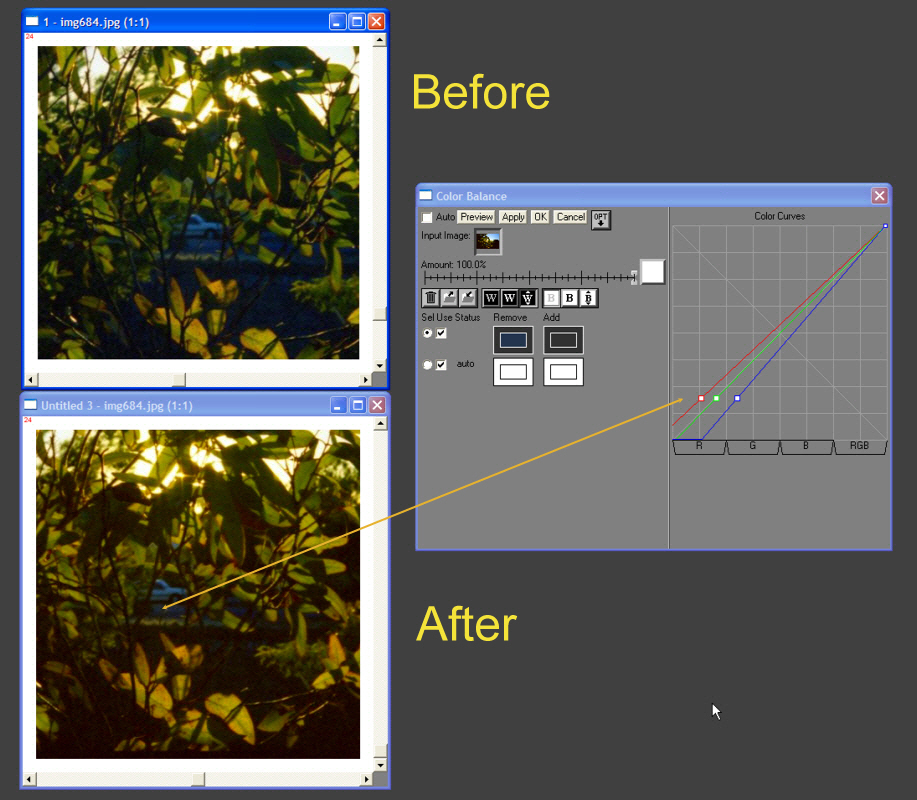
Credit for original image scanned on Epson 4490, using the epson software taken from this thread
Heisenberg Uncertainty Principle or One Way To Use A TLR For Street Photography
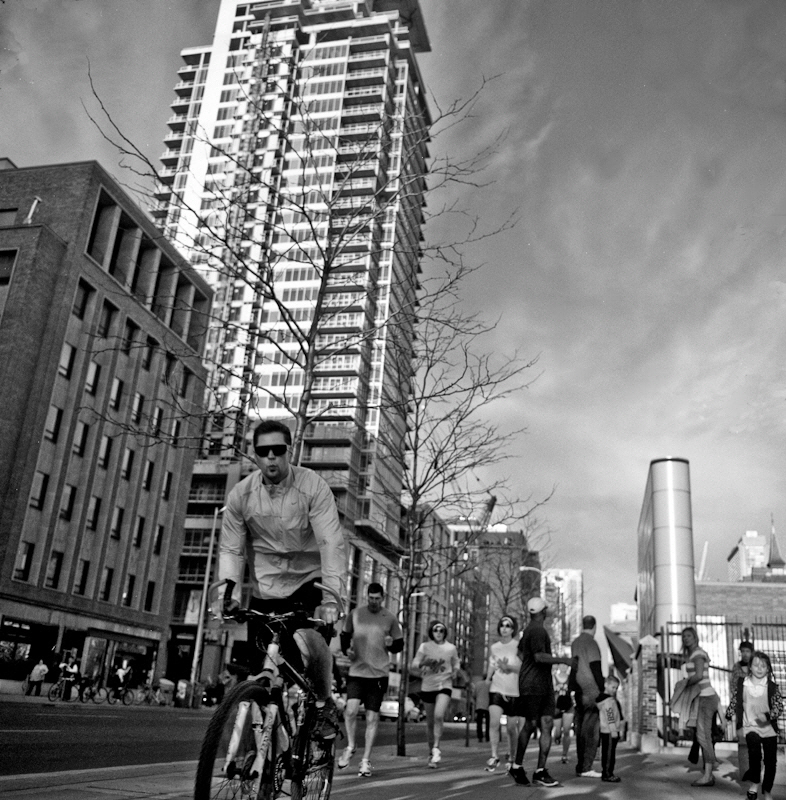
There are many schools of street photography starting from the most famous Cartier Bresson.
Notice how he holds his camera when not being used. This would still work today.
www.youtube.com/watch?v=CqsOYsZlPX4
www.youtube.com/watch?v=mjjGiBUaf4s
Or the currently in vogue copying of Bruce Gilden flash in the face style: www.youtube.com/watch?v=IRBARi09je8
The Heisenberg uncertainty principle gives us that the Photographer being the observer always alters the scene he’s trying to capture. No matter how much you try to camouflage the camera your actions still affect the scene. Hip shots, standing on the corner waiting, trying to blend in, using a camera phone or small point and shot are some of the many other methods which are used in street photography, all of them affect the scene to some degree.
You might not know but one way to camouflage a large building in sunlight is to shine a bright light on it as the human eye can not distinguish it from the skyline. A Mamiya TLR is pretty difficult to disguise even with a bright light.
The photo above is first of a series using a new to me idea for using my TLR for Street photography. That is to place myself in the middle of the path and be obviously taking photos, because people know that they either move around me or I become almost invisible under the camouflaged so to say right out in the open. Now under the Heisenberg Uncertainty Principle the observer (photographer) is part of the scene so taking photos or not taking photos does not affect the “quantum” state.
Odds and Ends In B&W Film Development
If you can soft boil an egg and you have a sink you can develop B&W film
Lucky Seven D76 Development Times
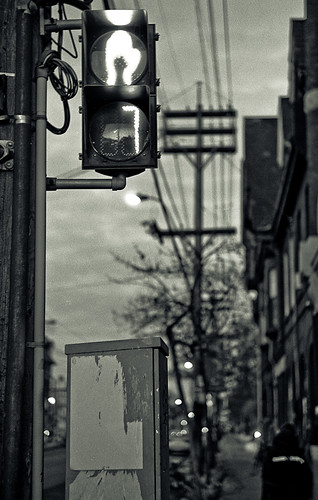
B&W Development From One Shot Powder D76
8×10″ Large Format Foam Core Pinhole
Now days I mainly use one shot (dispose after one time use) Kodak TMAX Developer for pushing and Kodak XTOL for other work. I still like very Dilute d76 for my 8×10″ litho ortho film this only because I can develop by eye under a red safe light.
XTOL is one of the most environmentally friendly developers. It is also one of the best general purpose developers. I hear that Ilford DD-X is similar with the advantage that it is already in liquid form and a disadvantage that it is at least twice the cost per roll. I would suggest to the beginner that they would start out with a general purpose developer and get the basics down before experimenting with other developers and developing techniques.
For fixer I use a Kodak or Ilford rapid fixer. I reuse until it is too slow (takes twice as long as when fresh). A tip: Drop a piece of the film leader into the fixer and wait for it to clear multiple that time by 2 (3x for TMAX or Delta films) and that is the time you need to leave the film in the fixer. Kodak TMAX and Ilford Delta films eat up fixer and usually need much longer fixing times then other films. Important before disposing of fixer down the sink drop some steel wool in the spent fixer and wait for 24 hours. The steel will scavenge the silver out of the fixer. Remove the steel wool and now the fixer is safe to dispose of. Silver in solution is very toxic to the environment.
I do not use a stop bath for film (you need it for paper) it is only necessary if you have really short development times.
If your water is hard or has a lot of iron then use a Brita water filter. I let normal tap water sit over night with the top off the container so it can reach room temperature and any chlorine can come out. This is easier and less wasteful then trying to keep a constant temperature with running tap water Using the Ilford method for rinsing (see reference below).
When the film is wet the surface is soft almost sticky and can be permanently embedded with dust and water marks, it is also easily scratched at this point. Some tips on drying your film :
- Use a separate final rinse with a drop of wetting agent, if you have hard water then use distilled water for the final rinse
- Turn of your exhaust fan (leave it off) and run a steaming hot shower. The small particles of water will clean the air of dust particles
- Before hanging hold the film at both ends and shake to remove excess water. Be careful not to use excessive force or you could damage the emulsion
- Hanging the film on a diagonal will speed up the time that it takes water to run to the edge
- You can blot excess water of the edges or end with lint free cloth or paper, coffee filters work well. Do not touch the emulsion! A rocket blower or other rubber bulb duster is a good investment as water drops can be blown off with a jet of air. It will also save you a ton of money in the scanning stage as canned air is really expensive.
- While a squeegee is sometimes recommended at the beginning of the drying process it is also responsible for scratches especially on films with softer emulsions. So consider not using one or possibly using your fingers (minus nails) as a better substitute.
Fixer Update:
It appears that a hypo-clear or eliminator after the fixer stage does not have much use with negatives (different for paper) and a rapid fixer, in fact residual thiosulfate and thionates may actual aid in the archival process. This article indicates that a 2 bath fixer may be much more effective then a single bath fixer as the first bath takes out the majority of silver while the second fresher bath removes products that the first bath can’t.
Final Rinse Update – In the past I had spots now none:
The final rinse is 3 minutes in distilled water; After the 3 minutes I then add 1 drop of Edwards wetting agent.; Shake really well for 5 seconds, wait until any foam dies down; Then remove film from liquid. Shake off excess water and hang to dry. Note distilled water only makes a different if the water has mineral content.
Absolutely no spots!
Notes on final rinse:
The distilled water adds about $0.15 per roll but it seems to be worth it, The trick seems to be prior to adding the wetting agent leave the film in the distilled water for long enough to dilute (replace) any of the tap water in the emulsion.
The purpose of the wetting agent is to lower the surface tension allowing any surface water sheet off the film. You do not want the wetting agent to soak into the film. Do not use dish water soap as a replacement for the wetting agent as it contains many chemicals that are undesirable if left behind in the gelatin layer also it does not have all the same desirable properties as wetting agents designed for film. See update here: http://metrix-x.rraz.ca/2012/12/developing-film-and-water-spots.html
Updates January 2012
Mixing Xtol
It seems to help if the water is towards the upper range of temperature
(see instructions so that you don’t overheat. I use a large plastic
spoon to stir and break up any clumps wait and repeat, wait some more
and repeat…. Eventually it will almost dissolve except I can never get
rid of a few small specks which I ignore. Add other package with about
500ml of water. If you want to be exact about the 5l then put 5l in the bucket and mark the level before you start.
Using A Stainless Sieve
When you are filling smaller glass containers with the xtol for storage
run it through a dollar store stainless sieve to remove any particles.
Sometimes in the winter my xtol stored in closed glass jars gets a bit
of white cloudy stuff. To remove pour it through a fine stainless steel
sieve just before using. Also used fixer can also can also get
contaminated and the same trick will work here. Just make sure you
rinse well directly after use. The sieve costs me less then $2 at the
dollar store.
Silk Gloves Better Then Cotton For Film Handling
For handling film instead of using those cotton gloves
which seem to pick up fuzz and deposit it on the film I found that silk
glove liners that you use for winter sports work much better without
picking up lint or static charging the film.
Useful References
The most important resource is the Massive Development Chart for developing times, while you are at it check out their meta list.
Don’t forget to check out APUG and their Beginners Guide
If you like Ilford then check out their pdf on Developing Your First Roll Of B&W
If you use stainless steel reels and have big fingers like me 35mm film is a b!tch to load. I found this thread on Flickr Loading steel reels – an alternative method a useful resource (note the link to another thread and a link to a video) If you end up with moon shaped marks on the film that means the film emulsion has be physically damaged by pressure (in my case it usually because of a finger pressure. At the end if parts of the film look undeveloped it is usually because on part of the film has crossed a spiral and was touching another part of the film.
Plastic or metal reels when loading 120 film make sure you cut off the tape at the end or it could get stuck where you don’t want it to be stuck.
For 35mm a tip is to not to rewind the leader all the way back into the canister (some of the newer cameras have a menu setting to leave the leader on rewind otherwise with manual rewind you can feel it when it is coming off the take up reel. If you have a leader you can trim it and start on the reel in the light!
Now days I trim the end flat and then rewind it back into the canister and open the canister and remove the spool in the dark with a bottle opener. This has the advantage of reducing the drag when respooling it on the reel.
For plastic I use AP reels and tanks, they are really easy to load and they have an innovative way of agitating without inversion. The only time I have had a problem is when I creased the leader and it got stuck starting at the second turn. Don’t panic you have to release the film not by pulling it out as with other types of spools but by first separating the two halves of the spool. Make sure practise doing this and all other aspects of loading with your eyes close or in the dark.
If you use a changing bag make sure it is large enough not to be cramped. A tip I was given was to keep my eyes closed so you are not distracted and disoriented by your vision. I find it easier to load in a bathroom with the door and windows blocked out. (make sure you turn off anything with led lights and do not wear a watch that glows in the dark)
Kodak Xtol Developer – Unofficial Resource Page
T-Max Films — What Rochester Forgot to Tell Us
A few ideas on using Kodak T-Max Films Successfully by John Sexton
You can see that I like TMAX film, what’s not to like with a possible dynamic range of 19.5 stops!